Discounts
Discounts Overview
System discounts in FTx Cloud POS are automated pricing adjustments applied to products or transactions based on predefined rules. These rules determine when and how discounts are triggered, allowing businesses to strategically manage pricing while maintaining control over conditions such as timing, location, and quantity.
Reaching "Discounts"
- Step 1: Log into Control Center
- Step 2: Choose Point of Sale
- Step 3: Choose Pricebook
- Step 4: Choose Discounts/Buydowns
- Step 5: Choose Discounts
Understanding the "Discounts" Layout
Please see the image below labeled Figure 0.2 for a description of the buttons and fields that appear on the screen.
Key Information:
1. Add New: This button will bring up the New Discount Creation Form, allowing you to start creating your new Discount.2. Edit Discount: This button will open the Edit Discount Form for an existing discount.3. View Notes: This displays the created notes about any change in discount with a timestamp, note, and user who made the change.4. Copy Discount: This button will help you copy the selected discount.5. Delete: This button lets you permanently delete the discount record from Control Center.6. Mass Update: This button will update a list of discounts that have already been created in one go.7. Manage Discount Groups: This button will help you manage (add, edit, and delete) discount groups.8. Manage Discount Sets: This button will help you manage (add, edit, and delete) discount sets.
1. Adding a New Discount
- Click on the “Add New” button highlighted in Figure 0.2 above to create a new discount.
- The form highlighted in Figure 1.1 will appear on your screen.
1. "Details" Tab: This tab lets you define the general attributes of the discount.2. "Schedules" Tab: This tab is to define the scheduling option if required.3. "Options" Tab: Under this tab, you can configure settings for the new discount that is being created.4. "Uplift Configuration" Tab: You can select the loyalty customers from here to apply this discount as a loyalty discount.5. "Online Details" Tab: This tab is to define the information displayed online.6. Manage Assignment: This section is to assign locations.7. Discount Filters: This section is to set the filters for different zones.8. Action Buttons: Various saving buttons are provided to save the changes made.
1.1 "Details" Tab
- Name: Give a unique name to the new discount.
- Scan Data Name: The entered name is defined for the discount Scan Data Report.
- Discount Group: This field allows you to group the created discount with the selected group from the drop-down discount group.
- Discount Set: You can select Discount Set from the drop-down list. Any system discount can be added to a discount set, but only one discount per set can activate, regardless of the "Stackable" setting.
- Type: This button helps you define the type of discount from the list of options. See Figure 1.1.1.
Figure 1.1.1
- Dollar Off Each: Use this option to configure a discount where a fixed dollar amount is deducted from each item once a specified quantity is purchased.
- Set the quantity required to trigger the discount.
- Enter the dollar amount to be deducted per item.
Figure 1.1.2For example: If "Qty= 4," and "$ Off Each Item = $1.00" with the "Or More" set to "Yes," this discount will trigger when a customer buys 4 or more quantities of trigger item(s), and they will get $1.00 off on each item.
- Percentage Off Each: This discount gives a percentage off on each item. The quantity option represents the number of items required for the discount to apply. The amount option will determine the value to discount from the items based on the percentage of their retail price.
Figure 1.1.3
When the "Or More" toggle is turned "On," the discount applies if the customer buys the set quantity or more.For instance, if Qty = 10 and "Or More" is "On," then buying 10 or more items will apply the set percentage discount to each item.
- Buy X Get Y Free: Using this discount option, you can set up a Buy X get Y Free deal. The buy option allows you to choose the quantity that is required to trigger this deal, and the quantity option is the amount you will give free once we hit the trigger amount.
Figure 1.1.4
- X items for Y Dollars: With this discount type, you can set up an X Items for Y Dollars deal using this option. The buy option allows you to choose the quantity that is required to trigger this deal, and the for option is the amount we will mark the products (together).
Figure 1.1.5
- Buy: The number of items (X) a customer must purchase together to qualify for the deal
- For: The total price (Y Dollars) the customer will pay for the set of items defined in the Buy field, not the price per item, but for the group as a whole.
- Buy X Get Y% Off: This discount type allows you to set a required purchase quantity (X) to trigger a deal where the customer receives a percentage discount (Y%) on additional item(s).Figure 1.1.6
- Buy: The number of items a customer must purchase at full price to trigger the deal.
- % Off: The discount percentage offered on the additional item(s).
- For Qty: The number of items that will get the discount.
- Buy X Get Y for Z Dollars: This discount option allows you to set up a Buy X Get Y for Z Dollars discount type. The Buy X option allows you to choose the quantity required to buy. The Get Y option is the number of items being given the total price of Z Dollars.Figure 1.1.7
- Buy X: The number of items a customer must purchase at full price to trigger the deal.
- Get Y: The number of additional items the customer will receive as part of the deal.
- Z Dollars: The total price the customer will pay for the Get Y items combined (not per item).
- Spend X Dollars on Y Products & Get Z Products for Free: The Spend X Dollars and the Y Products options allow you to set the amount and number of products that are required to trigger this deal. Z Products is the list of items you will get free.
Figure 1.1.8
- X Dollars: The minimum amount the customer must spend on trigger items to qualify for the discount.
- Quantity: The number of free items (Z Products) the customer will receive once the conditions are met.
- Y Products: The minimum number of qualifying items the customer must purchase as part of the trigger condition (along with the spend amount).
- Spend X Dollars and Buy Y Products & Get Z Dollars Off Each: This discount type lets you configure a deal where the customer must spend a specified amount (X Dollars) on trigger items and purchase a set number of discounted items (Y Products) to get Z Dollars Off each of those discounted items.
Figure 1.1.9
- X Dollars: The minimum amount a customer must spend on trigger items to qualify for the deal.
- Y Products: The minimum number of qualifying items the customer must purchase (in combination with the spend condition) to activate the discount.
- Quantity: The number of Z Products the customer will receive for free once the spending and product quantity conditions are met.
- Spend X Dollars (on Trigger Items) and Buy Y Products (Discounted Items) & Get Z% Off Each: This option lets you configure a discount where the customer must spend a set amount on trigger items and buy a specific number of discounted products to receive a set percentage off each discounted item.
Figure 1.1.10 - Spend X Dollars defines the minimum spend required on trigger items.
- Y Products is the number of discounted items the customer must purchase.
- Z% Off Each is the percentage discount applied to each discounted product once the conditions are met.
Or More Toggle: If the Or More toggle is turned "On," it means the discount will trigger if the customer spends the specified amount or more on trigger items. For example: If the value for X Dollars is 100 and the Or More toggle is "On," then when the customer spends $100 or more on trigger items and buys the required number of discounted products, they will receive the set percentage off on each discounted product.
1.1.2. Manage Assignment
Figure 1.1.2.1
- Manage Assignment: This part is also called location assignment. You can assign or remove location(s) or location group(s) from the Manage Location Assignment section.
- When you assign location(s) or location group(s) to a discount, the users of those location(s) or location group(s) will be able to see the added discount in their system.
- The system assigns All location(s) and location group(s) to a discount. You can assign only the required location(s) or location group(s) to a discount group if needed.
- Follow the steps mentioned below to assign a location(s) or location group(s) to a discount group:
- By Locations: Select this option to assign specific location(s) to the discount.
- By Location Group: Select this option to assign the location group(s) to the discount.
- All: Select "All" to apply the discount to all your business locations.
- Click on "By Locations" or "By Location Groups" from the Select Locations drop-down as per your requirements. Use the "Manage" button to select and add the location(s) and location group(s) for the discount. You can delete the selected location(s) and location group(s) too.
- Click on "Manage." Figure 1.1.2.2 will appear.
Figure 1.1.2.2
- Use this Search box to search for a specific location.
- Use this drop-down to view the locations that have a specific Pricebook Zone.
- Use this drop-down to view the locations based on three parameters: All Locations, Only Active, and Only Deleted.
- The Results section shows the list of locations. By default, it shows all locations. If you have made specific selections in 1, 2, or 3, it will show the location list accordingly. Select the Locations you need to assign to the discount by checking the checkboxes against the location name.
- Click the Green Arrow button to move the selected locations to the Selected List.
- Clear Selection: If you want to remove the whole selection, click the "Clear Selection" button. You can remove any record from the list by clicking the Remove (x) icon. Delete Single Store Location will help clear the location adjacent to the "Delete" button, and the discount will no longer be applied to that location.
- Apply: Click "Apply" to apply the selection.
1.1.3. Discount Filters:
Figure 1.1.3.11. Add Item Type: Lets you expand discount eligibility by adding broader item types like:
- Department, Department Group
- Categories
- Brands
- Manufacturer, etc.
2. Preview All Zones: Gives you a summarized view of how the discount behaves across all store zones where it is applied, helping you validate if it’s set up correctly for multi-location environments.
3. Manage Product (4): This shows how many individual products are currently part of the discount. In this case, 4 products are included (though only two are visible in the image).
4. 👁️🗨️View: Opens a pop-up listing all products under the selected Item Type filter with their effective sales prices.
5. ❌ (Remove): Allows you to remove a specific product from the list, which means the discount will no longer apply to that item.
6. Manage Button: This button will let you manage (add/remove) the item type.
7. Product List Table:
- Name: The name of each product included in the discount.
- UPC: The Universal Product Code used to uniquely identify each item.
- Discount Multiplier: Indicates how many times the discount should apply per unit. For example, if it's set to 1, the discount is applied once per item purchased.
To select "Products" as Item Type, follow the following steps:
- Click on the "Add Item Type" button.
Figure 1.1.3.2
- Navigate back to Discount Filters on Add/Edit Discount screen.
Figure 1.1.3.3
- Click on the "Manage" button.
- The screen highlighted in Figure 1.1.3.4 appears.
Figure 1.1.3.4
Manage Filters Screen Information:
1. Search: Use this search box for a specific result.2. Results: Here, you see the relevant list of data for the selected discount. You can search for a specific discount in the "Search" bar as well.3. All Items: Use this drop-down to filter the Manage Filters screen data based on four parameters: All Items, Child Only, Parent Only, and Standalone only.4. Select the required products by checking the appropriate checkboxes.5. Arrow: Click the green Arrow button to move the selected records to the Selected List Area as highlighted in Figure 1.1.3.5.Figure 1.1.3.5
1. Click the "Clear Selection" button to remove the whole selection. To remove any record from the list, click the Remove (x) icon.2. Discount Multiplier: It shows how many times the discount should apply per unit. For example, if it's set to 1, the discount is applied once per item purchased. By default, it displays value 1. However, the value can be reset through Change All Discount Multiplier Value.
- Set the Discount Multiplier value and click "Apply."
3. Apply: Click the "Apply" button for the selected parameters. The system will navigate you to the Edit Discount screen.4. Change All Discount Multiplier Values: This button allows you to update the discount multiplier for all selected items at once. Depending on the Discount Type, the multiplier determines how many times the discount is applied when the items are purchased.
5. Print: This button is used to print the list of selected items. Select the export type as PDF, CSV, or Excel and turn the header and title-related toggle ON/OFF as required. Click on the "Start Print" button.
Figure 1.1.3.76. Close: Click to close the Manage Filters window.
Click on "Preview All Zones" to open up the Viewing All Matched Products screen as displayed in Figure 1.1.3.10.
1. Select Pricebook Zone: This dropdown contains the list of all the pricebook zones assigned to the discount. Use the checkbox beside each pricebook zone to select one or more pricebook zones. The “All” option allows you to view discounted prices of all zones. The data is generated depending on the selection.2. Queued Price: Set this to "Yes" to preview the sale price after including all the queued changes during the period the Discount is active.3. Print: This button will print the Discount Item report in PDF format. You can select a maximum of 6 zones for printing.
Figure 1.1.3.11
- For Departments/Brands/Category/Other Item Types:
- If you have selected different Item Type, as highlighted in Figure 1.1.3.12.
Figure 1.1.3.12Delete/Remove: Click on the (X) Manage Product/Brand ribbon to remove the entire item type, i.e., Products/Category.Click on (X) present against each product or brand to remove a single item.
- View Button
: Clicking this button opens a pop-up displaying a Discount Details report for items within all the selected department(s).
Figure 1.1.3.13
- View Button
: Clicking this button opens a pop-up displaying discount details for all items within the selected department (e.g., Food) across the selected or all zones.
Figure 1.1.3.14
- Name: This column displays the name of the products on which the created discount is set.
- UPC: This column displays the UPC for the added products.
- Item Type: This column displays the item type, i.e., is a Product, Category, Department, Department Group, Manufacturer, Brand, or Tags.
- Discount Count: This column shows the total number of discounts applied to each item. Explained below.
- Price in Zone CA: This column displays the non-discounted price of the product for Zone CA pricebook zone.
- Discount in Zone CA: It displays the discount amount that is being applied to that product with the discount type configured.
- Sale Price in Zone CA: It displays the discounted sale price of the configured product for that pricebook zone.
- Click on "Cancel" to discard the changes made or to exit the form.
This indicates the total number of discount rules applied to each item. It helps track how many promotions or markdowns influence the final item price.
- Discount Name: Clickable link that opens the Edit Discount page in a new tab.Figure 1.1.3.16
- Amount: Displays the discount value, which may vary at runtime.
- Start Date: When the discount begins.
- End Date: When the discount ends.
The Trigger Option defines the condition that must be met for a discount to be applied. It determines whether the discount is automatically applied or requires a specific trigger, such as a list or coupon. This flexibility allows you to create a variety of promotional strategies — from automatic markdowns to coupon-based and bundled discounts.
Here are the available trigger types:
- None: No trigger is required. The discount applies automatically when the item(s) meet the defined criteria.
- Trigger List: The discount is applied only when items from a predefined trigger list are purchased.
- Coupon: Requires a coupon code to be entered at the point of sale for the discount to activate.
- Trigger List & Coupon: Both a specific item (from the trigger list) and a coupon code must be used to qualify for the discount.
- Trigger List or Coupon: The discount is activated if either the trigger list item is purchased or a valid coupon is applied.
Figure 1.3.2.1
- Trigger List: Choosing this option will only activate the discount if it is set for a selected list of items.
Figure 1.3.2.21. Trigger Quantity: This button sets the trigger quantity to activate the discount for the trigger list of items.2. Manage Trigger Items: This button will help manage and select the items that are to be added under the Trigger Items List. See Figure 1.3.2.3Figure 1.3.2.3
- Use this Search box to search for a specific product.
- Select Item Type displays the options such as Product, Category, Department, Department Group, Manufacturer, Brand, Tags, etc. Upon selecting an option, a corresponding window, such as “Manage Category,” will appear.
- The Results section shows the list of Item Type. By default, it shows all. Select the item type that needs to be assigned to the discount by checking the checkboxes against the item name.
- Click the Green Arrow button to move the selected Item Type to the Selected List.
- Clear Selection: If you want to remove the whole selection, click the "Clear Selection" button. You can remove any record from the list by clicking the Remove (x) icon. Delete Single Store Item Type will help clear the adjacent to the "Delete" button, and the discount will no longer be applied to that Item Type.
- Apply: Click "Apply" to apply the selection. Click on "Close" to exit Manage Trigger Items.
Once added, navigate back to the Add/Edit Discount screen to view the added discount trigger list.3. View: Click on the view button to preview the trigger list as done in the Add Item Type under 1.1.3. Discount Filter section above.
4. Remove: Click (X) to remove the items from the trigger list.
- Coupon: Choosing this option will only activate the discount for any discount coupon.
Figure 1.3.2.4
1. Add: This button will add a new row for coupons for different stores.
- Type: This field describes the discount type, i.e., online, store, or both.
- Coupon Code: The coupon code is generated by the auto-generate button highlighted as
in Figure 1.3.2.4.
2. Auto-Generate: This button will auto-generate the coupon code.
- Description: The description serves to explain the specifics of the coupon discount type, e.g., 10% off.
3. Download: This button will let you download the coupon in QR code or barcode format. But for that, you will have to save the changes first; otherwise, the error message as shown in Figure 1.3.2.5 will be displayed.
Figure 1.3.2.5
- For this, click on the "Save" button featured on the top-right corner of the Discount form.
- Once done, click on the "Download" button to download the coupon in QR code or Barcode form as required.
Figure 1.3.2.6
4. Delete: This button will delete the created coupon.
- Trigger List & Coupon: This option requires both a valid coupon and the purchase of an item from a predefined trigger list for the discount to apply. The discount is activated only when both conditions are met.
Figure 1.3.2.7
- Trigger List or Coupon: With this option, the discount will be triggered if either a predefined item from the trigger list is purchased or a valid discount coupon is applied—meeting any one of the two conditions.
Figure 1.3.2.8
1.2. "Schedules" Tab
Follow the steps mentioned below to schedule a discount:
- Click the “Schedules” tab highlighted in Figure 1.1 above to schedule a discount.
- The form highlighted in Figure 1.2.1 will appear on your screen.
Figure 1.2.1
Start Date: Select a date from the attached calendar to determine when the discount will become active.
End Date: Choose an end date from the drop-down calendar to specify when the discount will expire.
- Use Schedule: Enabling this toggle activates the discount on specific (selected) days and time ranges. This feature is commonly used to attract more customers during slower business hours.
Figure 1.2.2
1.3. "Options" Tab
Follow the steps mentioned below to configure different settings for the discount:
- Click the “Options” tab highlighted in Figure 1.1 above to set different attributes for the discount.
- The form highlighted in Figure 1.3.1 will appear on your screen.Figure 1.3.1
- Receipt Text: Enter a short text (40 characters) displayed on the receipt in a discounted transaction (e.g., Discount123 Applied).
- Priority: Use this setting to set the triggering priority of a discount, which is helpful when discounts are stacked with “Stackable” feature (explained below).
- Limit Per Transaction: Set this to 0 to allow discounts without limits per transaction. Set the value to 1, 2..., to allow 1, 2...discounts per transaction.
- Stackable: If this toggle is set to "Yes," it implies that multiple discounts can be allowed on the same product in a single transaction. Set this to "Yes," to allow multiple discounts on one item in a single transaction. Set this to "No" to allow only the highest priority discount to trigger per transaction.
If an item has two applicable discounts — one for $0.10 with Priority Level 1 and another for $0.05 with Priority Level 2—and both are marked as Non-Stackable, only the $0.10 discount will apply at the register. This is because the system gives precedence to the discount with the highest priority (i.e., the lowest priority number).- Inherit Tax Settings from Group: Set this to "Yes" to allow the discount to inherit settings from the group.
Figure 1.3.2If you wish to customize the tax settings for discounts, then set this toggle to NO and manage settings as required for Reimbursable Discounts and Apply Tax Before Discount.
- Reimbursable Discount: Set this to "Yes" if the discount is offered and funded by the manufacturer, and the store will be reimbursed for it. Set to "No" if the store is giving the discount at its own cost and won’t be paid back.
- Apply Tax Before Discount: Depending on the location, discounts may or may not be taxed; it is generally dependent on the Tax code at that location. If this toggle is set to "No" in a scenario wherein you have purchased a one-dollar item with a 10-cent discount, the remaining 90 cents will be taxed. If it is set to "Yes," tax is calculated on the full one-dollar amount before the discount is applied.
- Apply to Cost: If this is set to "Yes," then in addition to reducing the retail price, it will also reduce the cost, and if it is toggled to "Yes," it functions as a buydown, i.e., the discount will be applied to both the cost and the price.
- Discount Commission: If this is set to "Yes," the Spiff Amount field becomes visible. And now this transaction will act as an uplift sale. It will offer a discount as per the discount type selected and will also offer the Spiff Amount commission to the cashier.
- Spiff Amount: Set the dollar amount as a spiff to be given out to the cashier when sales are promoted, and this discount is triggered.
- Commission Trigger Type: The commission has 3 trigger types:
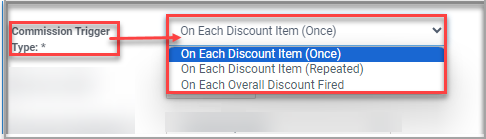
Figure 1.3.3
- On Each Discount Item (Once): Select this option to offer a commission only once when the customer purchases the same item multiple times in a transaction with a single discount type.
For example, if the customer bought 10 cigars where the discount type is selected as Buy X and Get Y Free is triggered twice when 10 cigars are bought where the value of X=4 and Y=2. With "On Each Discount Item (Once)" the cashier will get the set commission only once. However, if different sets of items are bought with different discount types, the cashier would get the configured commission (spiff) for each trigger.
- On Each Discount Items (Repeated): If the commission trigger type is set to On Each Discount Item (Repeated), then the cashier would get the set commission on each discounted item that they sell.
- On Each Overall Discount Fired: If "Each Overall Discount Fired," then the cashier would get the set commission for the overall discounts applied.
- Max Qty to Spiff: This field is to set the maximum number of spiffs that is allowed to the cashier in a single transaction, triggering different discounts.
- Scan Data Classification: The scan data can be classified into the categories mentioned in the drop-down menu. See Figure 1.3.3 below. You can pick it as Automatic/None, MultiPack, Account Funded, or Manufacturer Funded. In the scan data file, the information generated for this discount will be labeled according to the selected scan data classification option.
Figure 1.3.4
- Scan Data Code Override: This field lets you override the scan codes for the scan data report. You can use a comma to separate the codes if multiple codes are to be overridden.
- Require Loyalty: Set it to "No" for the discount to function for all customers. Set this to "Yes" for the discount to be given to a registered loyalty customer only.
- Registered in Past X Days: This field gets activated when the Require Loyalty toggle is set to "Yes." With this field, the discount will require loyalty, but it also has to satisfy the Registered in Past X Days condition. Fill in the value of days for the registered customer.
- Customer Daily Limit*: If the limit is set to 1, then each item in the discount can be taken advantage of by the customer in a 24-hour period.
- Customer Weekly Limit*: If the limit is set to 1, then each item in the discount can be taken advantage of by a customer in a 7-day period.
- Customer Total Limit*: This would be the total number of discounts that can be taken advantage of by a customer during the time period of the discount, ranging from the start date to the end date.
- Require House Level: When this toggle is set to "Yes," the discount will require the house account level information. It also activates House Account Level to select the house level from.
- House Account Level: Choose the house account level from the attached drop-down list.
If the discount is selected for Discount Level 2 for a particular house account, then the house account customer can purchase the product with a 10% discount on the price.Figure 1.3.5
- Store Limit: This limit is the total limit of the discount that a store can render during the time period of the discount, ranging from the start date to the end date.
- Overall Limit: This limit is the total number of discounts that are divided or offered to all the stores.
- Enable Loyalty Club: If this toggle is set to "Yes," the discounts will only be applicable to loyalty customers.
- Club Trigger Qty: If set to "Yes," the discount will only activate when the set item trigger quantity is bought.
- Accounting Code: This refers to the specific accounting identifier assigned to the discount. It helps categorize and track the discount within your accounting system.
Export Description: This field provides a brief description of the discount for export purposes, ensuring clarity when transferring data to an accounting system.
- Disable Sending Alert: This setting allows you to disable the discount expiration notification for the store.
- Auto Send Report When Discount Completed: When this toggle is enabled, the discount information in the selected Report Type will be automatically sent to the configured email addresses under Maintenance>>Settings & Panels>>Settings>>POS>>Product/General Settings>>Pricebook Notifications when Discount's end date has been exceeded.
- Report Type: This field appears when Auto Send Report When Discount Completed toggle is set to "Yes." Select the report type as Report on Sales Data. The report will be sent in the selected report format.
1.4. "Uplift Configuration" Tab
Figure 1.4.1
- Configure Uplifts Triggers: Click this button to configure the uplift based on your requirements.
- Trigger When: Please select this when you want the uplift to trigger when this discount is applied from the three options shown in Figure 1.4.2.
Figure 1.4.2
- Clerk Message: Please enter the message for the clerk/cashier to read as a script. This is an optional field.
- Uplift Message Type: This section lets you select the image for the uplift.
Figure 1.4.3
- Advertisement: The added advertisement list will appear if you choose this option and click the "Choose Advertisement" button. You can select the desired image from it.
- Custom Upload: The "Manage Custom Images" button will appear if you choose this option. Click it to open the "Manage Uplift Images" screen and choose the required custom image for the uplift.
1.5. "Online Details" Tab
- Online Title: Title to be displayed for the online discount.
- Online Description: Description of online discount.
- Online Category: Defines the online category under which the discount falls.
- Advertisement ID: A unique identifier assigned to each online discount for tracking and reporting purposes.
- Age Restricted Offer: Enables the discount to be visible only to age-verified customers (21+).
- Required Click To Card:
- When set to "Yes," customers must explicitly click or tap on the offer (for example, “Click to Card”) to activate the discount. The offer will be visible on the frontend only if the eligibility criteria are met, and once activated, it can be applied during checkout.
- When set to "No," the discount is automatically available without any manual action from the customer. However, it will be displayed and applied during checkout only if the eligibility criteria are met.
- Online Image: Allows uploading an image associated with the online discount.
2. Editing a Discount
- Click on the Edit button highlighted in Figure 0.2 above to edit a discount.
- The form highlighted in Figure 2.1 will appear on your screen.
The fields are explained above under the Adding Discount section.Figure 2.2
- Include Header: If this toggle is set to "Yes," then only you will be able to see the below-mentioned two fields. Setting this to "Yes" also means it will include the Discount Name as the header of the file on every page.
- Repeat Headers On Every Page: Include Header must be set to "Yes" to allow this to work. If set to "Yes," the Header information will display on each page printed.
- Print Title On Every Page: For this to work, Include Header must be set to "Yes" to allow this to work. If set to "Yes," the title will print on each page. Figure 2.3 displays a sample discount in PDF form with all three above-mentioned toggles set to "True."
Figure 2.3
These changes can be mapped under the View Notes feature explained below. 3. Add/View Notes
3.1. Add Notes
- Click on the "Add Note" button highlighted in Figure 3.1.1 below to add discount notes.
- Write the note explaining it in under 255 characters.
- Click "Add" to save the note.
3.2. View Notes
- Click on the View Notes button highlighted in Figure 0.2 above as well as in Figure 3.2.1 below for reference to view discount notes.
Figure 3.2.1
- The screen highlighted in Figure 3.2.2 will appear on your screen.
Figure 3.2.2
Audit-Related Information
- Created At: Date and time when the discount was created.
- Created By: Username of the user who created the discount.
- Modified At: Date and time when the discount was last modified.
- Modified By: Username of the user who last modified the discount.
4. Copying a Discount
- Click on the Copy Discount button (see Figure 0.2) to copy the attributes of the current discount to another. This feature is accessible from Edit Discount page and from the Discounts home screen as well.
- On clicking, a form shown in Figure 4.1 appears.
Figure 4.1
1. Fill in the name of the copied discount in the textbox.2. Set Copy Customer toggle to include the customer's whitelist while copying a discount (explained under the heading 4.1)3. Click on the "Copy" button to copy the discount along with the customer's whitelist (if the Copy Customer is set to "Yes").Figure 4.2
- Click on the "Close" button to close the success dialog box.
- Click on the "Go to the New Discount" button to go to the copied discount.
4.1 Including Customer Whitelist While Copying a Discount
When copying a discount, enabling this option ensures that the associated customer whitelist — i.e., the list of approved customers eligible for the discount — is also duplicated. This maintains consistent customer eligibility in the newly copied discount.
To include the customer whitelist during the copy process, ensure the following conditions are met:
This option works only for Loyalty Customers hence, to do so, you need to set the Require Loyalty toggle to "Yes."Figure 4.1.1
- Once Require Loyalty toggle is turned ON, it will enable the "Customers" tab for you.
Figure 4.1.2
- Manage: This button lets you select and add a loyalty customer to the discount.
Figure 4.1.3
- Once the list is applied, it appears as displayed in Figure 4.1.4.
When the customers list is added, it will be copied along with the discount that is being copied.
Figure 4.1.6
- Click on the "Copy" button to copy the discount along with the customer's whitelist (if the Copy Customer is set to YES).
- Click on "Close" to close the Copy Discount dialog box.
5. Deleting a Discount
- Click on the Delete button highlighted in Figure 0.2 above to delete a discount.
- The dialog box highlighted in Figure 5.1 will appear on your screen.
- Click "Yes, Delete" to continue the process of deleting the discount record. Once deleted, the message acknowledging the discount deletion pops up as displayed in Figure 5.2.
Figure 5.2
- Click “Cancel” to close the dialog box and skip the deletion process.
6. Mass Updates
- Click on the "Mass Update" button highlighted in Figure 0.2 above to update discounts on a mass level.
- The dialog box highlighted in Figure 6.1 will appear on your screen.
Figure 6.1
- Check the discount name you wish to edit/update.
- To select the "n" number of discounts, hold the Ctrl button and check the associated checkboxes to select multiple discounts.
- List: This is a list of all the discounts created in the system.
- Attributes: These are the critical attributes of the system discount that can be managed according to needs.
- Alter Date Ranges: You can alter the date ranges only when the associated value with the toggle trigger is set to "On." See Figure 6.2. This allows you to change the date range in terms of days, weeks, and months.
1) Change Date Range: You can change the date range of the created discount with this Alter Date Range option. This option offers you the liberty to change the start or end date of the discount duration.2) Extend Date Range: This option lets you extend the date of discount by X number of days, weeks, and even months.3) Change End Date: This is another option that will help you alter the date range by changing only the end date of the discount period.
Figure 6.3
- Change Stackable To: If the preceding toggle is set to "On," then you are allowed to change the value of "Change Stackable To" to "True" or "False" as needed in the selected discounts.
- Change Apply Tax To: If the preceding toggle is set to "On," then you are allowed to change the value of "Change Apply Tax To" to "True" or "False" in the selected discounts.
- Change Require Loyalty To: If the preceding toggle is set to "On," then you are allowed to change the value of "Change Require Loyalty To" to "True" or "False" in the selected discounts.
- Change in Scan Data Report To: If the preceding toggle is set to "On," then you are allowed to change the value of "Change in Scan Data Report To" to "True" or "False" in the selected discounts.
Various buttons on the "Mass Update" Form:
- Delete Discount: This toggle, if set to "On," will allow you to delete the selected discounts.
- Apply Location Changes: Whenever the related flag is set to "On," then you will have the ability to replace the existing locations for which the discount is applied to the selected location(s) from the "Manage" button.
- Manage: This button will help you replace the existing location(s) with a new location(s) for the selected discounts.
- Cancel: This button allows you to cancel all the changes made in the dialog box and takes you back to the previous form.
- Update Selected Discounts: This button will help save and update all the selected discounts to new attributes.
6.1 Show Entries
7. Managing Discount Groups
Discounts with similar attributes are grouped as one.
- Click on the "Manage Discount Groups" button highlighted in Figure 0.2 above to manage the discount groups.
- The dialog box highlighted in Figure 7.1 will appear on your screen.
Figure 7.1Fields and Buttons:1. Discount Group List: This list presents you with a list of discount groups that have already been created.2.1 Assign Discounts: This button helps you assign discounts from the list of created discounts to the discount groups.
Figure 7.3
- Name: This field is for setting up a name for the discount group.
- Apply Tax Before Discount: Depending on the location, discounts may or may not be taxed; it is generally dependent on the Tax Code of that area. If this toggle is set to "No" in a scenario wherein you have purchased a one-dollar item with a 10-cent discount, the remaining 90 cents will be taxed. If this is set to "Yes," then you are taxed before the discount is applied.
- Accounting Code: This field requires the general ledger accounting code for the discount group.
- Reimbursable Discount: If the discount is offered by the manufacturer, then it is reimbursable to the store by the manufacturer. Turn this toggle "On" to apply this setting to this discount group.
8. Managing Discount Sets
- Click on the "Manage Discount Sets" button highlighted in Figure 0.2 above to manage the discount set.
- The dialog box highlighted in Figure 8.1 will appear on your screen.
Figure 8.1
Figure 8.2
Figure 8.3
Figure 8.4
- Click "Yes, Delete" to continue the process of deleting the discount set record.
- Once deleted, the message acknowledging the discount set deletion pops up as displayed in Figure 8.5.
Figure 8.5
- Click “Close” to close the dialog box and skip the deletion process.
9. FTx Academy Training Course
Check out this FTx Academy video to discover how to set up and manage discounts and buydowns.Check out this FTx Academy video to learn how to set up and manage scan data discounts.Related Articles
Discounts - Store Employee
Discounts Overview In FTx Cloud POS, system discounts are automated pricing adjustments applied to products or transactions based on predefined business rules. These rules enable businesses to strategically manage pricing across various locations, ...System Discounts Report
System Discounts Report Overview This report is multiple reports in one and gives different formats, groupings, details, and summaries of system discounts applied in transactions. Different types of filters can also be configured, depending on your ...System Discounts Report - Store Employee
System Discounts Report Overview The "System Discounts Report" in the FTx Cloud POS system provides a detailed overview of all discounts automatically applied by the system based on predefined rules or promotions. This report is a collection of ...Discount Details Report
Discount Details Report Overview The "Discount Details Report" offers a comprehensive breakdown of all discounts applied within the system. It includes essential information such as UPC, Pricebook, Old Price (before discount), and New Price (after ...Flash Report - Store Employee
Flash Report Overview The "Flash Report" lets you view three configurations: Buydowns, Commissions, and System Discounts. You can filter them by using the Current, Future, and Expiring filter options. This article includes information about: How to ...