Employees
Employees Overview
When you sign up with FTx Cloud POS for the first time, the system creates your API account. You receive an email with information about the API email, username, and password. The system also creates an API user, an employee user, and a client user by default. You can create other employees as per your requirements.
Every employee is assigned a specific set of permissions, which can be either assigned individually to them or inherited by employee groups. The employees are enabled/disabled to perform actions that are directly tied to their logins.
 The hierarchy of users, as per the granted permissions: Corporate User > Manager > Store Employees.
This article focuses on how you can manage your employees in Control Center.
Reaching the "Employees" Module
To reach the "Employees" module:
- Log into Control Center
- Choose Point of Sale
- Choose Maintenance
- Choose Users/Employees
- Choose Employees
Please see Figure 0.0 to understand the navigation better.
Figure 0.0
Understanding the "Employees" Module Layout
Please see the image below labeled Figure 0.1 for a description of the buttons and fields that appear on the
screen.
Figure 0.1
1. Add New Employee: This button helps the user add an employee to Control Center.
2. Edit New Employee: This button helps the user edit the employee in Control Center.
3. Delete Employee: This button helps the user delete an employee from Control Center
4. Mass Assign Location: This button helps the user assign the location on mass level.
1. Adding a New Employee
Follow the steps mentioned below to add a new employee:
- Click the “Add New” button highlighted in Figure 0.1 above to add a new employee.
- The form highlighted in Figure 1.0 will appear on your screen.
Figure 1.0
Form Fields:
1.1 Details Tab:
- First Name: Here, the first name of the employee that you are creating is to be filled in here.
- Last Name: Here, the last name of the employee that you are creating is to be filled in here.
- Display Name: Choose a display name for the newly added employee. This is a way to protect the real identity of the employee. If this field is left blank, the first and last names will appear on the (CFD) customer-facing display.
- Employee Number: The employee number for the employee that is to be created is mentioned here.
- Password: Set the password for the employee that will be required for logging in.
- Password Confirmation: Confirm the password creation by re-entering the password.
- Active: If the "Active" toggle is on, the employee is allowed all the permissions in the POS, if it is toggled off, it implies that the employee is no longer employed with the company and all the permissions assigned to them will be revoked.
- Date of Birth: The birthdate of the employee is entered here.
- Date Hired: The date of hiring of the employee is entered here. The system will accept:
- Any past dates.
- Till 1 year in the future from the current date.
- Scan ID: This field requires a unique ID number that is intended for employees who use a badge or a card to log into the POS. The employee would enter the badge number, and when the employee scans it, it would allow login for the POS.
- Payroll ID: Enter the employee's unique payroll ID here.
- Payroll EIN: Here, the Payroll Employer Identification is provided.
- Payroll Company: Input the payroll company used for this employee.
- Scheduler Type: This field is used to describe the scheduler type for the employee, i.e., Full Time (Salaried), Full Time (OT Eligible), or Part Time.
1.2 Contact Tab
Please see the image below labeled Figure 1.2.0 for a description of the buttons and fields that appear on the screen.
Figure 1.2.0
1. Address 1: In order to give the address details, give the address of the employee.
2. Address 2: Fill in more information, if required.
3. City: Mention the employee's city name.
4. State: Fill in their state name where their city lies.
5. Zip: Give the zip code of the city where the employee resides.
6. Home Phone: Fill in their home phone number in this field.
7. Cell Phone: Provide the employee's cell phone number in this field.
8. Emergency Contact Name: Enter the name of one emergency contact person provided by the employee.
9. Emergency Contact Number: Fill in the contact number of the emergency contact person for the employee.
1.3. Permissions Tab
Please see the image below labeled Figure 1.3.0 for a description of the buttons and fields that appear on the Employee (Permissions) screen.
Figure 1.3.0
Fields:
- Choose Group: If the employee group is already created, then you select it from the drop-down attached below.
- Add: The "Add" button helps you add a new employee group in case the existing one does not match the new employee profile.
Figure 1.3.1
- Is Manager: If the employee is a manager, set the toggle to YES and give the employee being added all the managerial rights.
- Allow To Change Password: This feature lets store employees update their Control Center password. It has three options: Inherit from Settings, Allow, and Disallow.
Figure 1.3.2
- Inherit from Settings: The system chooses this option by default and assigns the right to change the password based on the "Allow Change Password" setting in the "Product/General Settings."
- Allow: Choose this option to give the employee the right to change the password, regardless of what you have chosen in the "Allow Change Password" setting in the "Product/General Settings."
- Disallow: Choose this option not to give the right to change the password to the employee, regardless of what you have chosen in the "Allow Change Password" setting in the "Product/General Settings."
- Transfer Approval Type: For an employee to have permission for transfers, some approval may be needed, which can either come from the store (manager) or a corporate user. This is dependent on the option chosen from the attached drop-down options.
Figure 1.3.3
- Add Location Settings:
- To choose a location, click on "Add Location Settings" if you have to set specific settings by location.
Figure 1.3.4
- First, choose locations and then click on "Add Location Settings."
- See Figure 1.3.5. This Copy Location page lets you set the same location for POS and Handheld Settings. Set the flags to 'YES' and save the settings.
Figure 1.3.5
- Choose the applicable settings for the employee. You can select Use Group or Override the employee settings location-wise.
Figure 1.3.6
- Once configured, click "Save Settings," then "Close."
1.3.1 Dashboard Settings:
Dashboard settings change the control/permissions an employee has in the cloud dashboard.
Under Dashboard Settings, click "Modify Dashboard Group Settings" as highlighted in Figure 1.3.0 as  .
.
- You can choose a location and click "Add Location Settings" if you have to set specific settings by location.
- Choose the applicable settings for the employee, which are described below.
- Click on "Save Settings," then "Close."
Figure 1.3.1.0
Flags:
- Allow Pricebook: It permits to utilization of the "Pricebook" module in the employee cloud dashboard, allowing any change, such as prices and costs.
- Allow Buydowns: Commonly, the employees don’t have permission to deal with buydowns, and depending on the location, even managers don’t have permission for this. But, if this is turned ON, then the employee(s) will have the permission to manage buydowns from the employee cloud dashboard.
- Allow View Cost: This option allows the employee to view the cost of the products only. If set to NO, the employee won't have the right to view the cost from the employee cloud dashboard.
- Allow Vendor Parts: It permits the utilization of the vendor parts module from the employee cloud dashboard, allowing any change to take place, such as adding, altering, or deleting vendor parts.
- Allow Cost Editing: This is always turned off for both managers and non-managers. The corporate owner is only allowed to manage the cost of the products.
- Allow Cycle Counts: If turned ON, it permits the employee to utilize the cycle counts module from the employee dashboard, allowing any change to take place, such as reviewing, deleting, or applying a count.
- Allow Save/Reconcile of Cycle Counts: If turned ON, it permits the employee to utilize the cycle counts module and even save and reconcile the cycle counts.
- Allow Price Editing: This option is mostly set to NO because no employee is given the right to edit the price of the products.
- Cycle Counts Blind: If this option is turned ON, it will not display the cycle count value to the employee(s) in the employee cloud dashboard.
- Allow Skip Cycle Count Counted Prompt: If you toggle this setting to YES, the system will not prompt the employee about the cycle count counted in the employee cloud dashboard. It is generally set to NO.
- Allow Spot Checks: If set to Yes, it permits the employee to utilize the spot checks module in the employee cloud dashboard, allowing any change to take place, such as viewing spot checks.
- Allow Transfers: This option lets you manage Transfers from the employee cloud dashboard for items if toggled to YES.
- Allow Receiving: If this is set to YES, it allows the employee to handle the "Receiving" module from the employee cloud dashboard.
- Allow Reorder: Gives permission to utilize the reorder module from the employee cloud dashboard, allowing any change to take place such as creating, altering, or deleting orders.
- Allow Order Conversion: If this order is toggled to YES, it allows the employee to convert a purchase order into an invoice from the employee cloud dashboard.
- Allow Complete Orders: If this toggle is set to True, the employee will be allowed to complete the created orders from the employee cloud dashboard.
- Show All Statuses on Working Order: When this setting is set to YES, it will show all the statuses of the working order in the cloud dashboard.
- Allow Send EDI: If toggled to YES, this will let you send the purchase order electronically. If this is set to NO, then you can view and edit that purchase order, but you cannot send an EDI. This will require someone who has permission to do that. Since a person with permission is allowed to send an EDI, the order is always going to be correct.
- Allow Shift Recon: If this is set to YES, the employee will be allowed to do shift reconciliation from the employee cloud dashboard.
- Allow Daily Recon: If set to YES, this will allow the employee to do daily reconciliation from the employee cloud dashboard. Generally, store managers have this permission.
- Allow Departments: If set to YES, it permits the employee to utilize the department’s module in POS, allowing any change to take place, such as creating, altering, or deleting departments from the employee cloud dashboard.
- Allow Department Groups: If it is set to YES, the employees will have permissions to manage the department groups module from the employee cloud dashboard. If it is set to NO, then you cannot see these options.
Figure 1.3.1.1 - Allow POS Flags: If this setting is set to YES, then employee(s) have the right to add, edit, and remove POS Flags from the employee cloud dashboard.
- Allow Taxes: It allows the employee(s) to utilize the taxes module in the POS, allowing any change to take place, such as creating, altering, and deleting tax rates and groups when set to Yes.
- Allow Vendors: This field, if enabled, will give you the privilege to add, edit, and delete vendors in its module.
- Allow POS Editor: If set to YES, it permits the employee to utilize the POS button editor module from the employee cloud dashboard, allowing any change to take place, such as creating, altering, and deleting both buttons and panels.
- Allow Message Delete: Set this permission setting to Yes to allow the selected employee to delete the dashboard messages.
- Allow Lottery: Toggling this to Yes will allow employees to access and handle the lottery module.
- Allow Adjustments: When set to Yes, grants permission to make inventory adjustments.
- Allow Vendor Return Worksheet to Adjustments: When enabled, it allows the employee to convert vendor returns be converted into inventory adjustments.
- Apply Adjustments/Transfers: Enabling this setting allows the employee to apply inventory adjustments and transfer items between locations.
- Allow Scheduler: When set to Yes, this setting allows employees to access the employee scheduler module and its functions.
- Scheduler Admin: When set to Yes, this setting allows employees to access the employee scheduler module with full administrative rights to manage all schedules.
- Allow Travel: Allows employees to log or manage travel-related tasks and entries in the system.
- Allow List Reports: Enable this setting to allow the employee to access and run List Reports.
- Allow Sales Report: Enable this setting to allow the employee to access and run Sales Reports.
- Allow Inventory Reports: Enable this setting to allow the employee to access and run Inventory Reports.
- Show Sales: Enabling this setting allows viewing sales transaction data during reconciliation.
- View Worksheets: It allows employees to log or manage travel-related tasks and entries in the system.
- Allow Edit Non-Working Order: Enabling this setting permits editing of orders having a working orders status from the employee dashboard.
- Allow Order Min/Max Editing: This setting, when enabled, lets you edit the min/max order quantities of a product at the product level.
- Allow Verify Invoice: Enabling this setting permits the employee to verify the invoice module and its function.
- Allow to Delete Cycle Count: Enable this setting to allow the employee to delete the cycle count record from the employee dashboard.
- Allow Broad Count: If set to Yes, it will allow the employee to access and manage the broad count module from the employee dashboard.
- Access to All Daily Recon: This setting, when set to YES, will give the employee access to all the daily reconciliations from the employee dashboard.
- Access to All Shift Recon: This setting, when set to YES, will give the employee access to all the daily reconciliations from the employee dashboard.
1.3.2. POS Settings:
These are the settings that allow employees to perform various actions in the POS application.
Under POS Settings, click on "Modify POS Group Settings" if you have to set specific settings by location.
- Click on the "POS Settings" tab.
- Choose the applicable settings for the employee, which are described below.
- Click "Save Settings," then "Close."
Figure 1.3.2.0
Flags:
- Allow POS: This is a global setting that, if set to YES, allows the employee to log into the application. The reason this is turned off is that some companies have counting teams/inventory teams that don't have access to log into POS because they are not allowed to ring up the sales.
- Allow POS Editor: This setting, if set to YES, allows the employee to make changes to POS buttons and layouts.
- Allow Training Mode: This setting, if set to YES, allows the employee to perform actions in the POS like test discounts, test buydowns, or practice ringing up items in the training mode.
- Allow Reg X: This allows the employee to perform register actions; it won't allow them to close the shift, but it will show him the status for the day for sales, total payments, and tenders that have taken place. So, if this is set to True, then it will allow the employee to do so.
- Allow Reg Z: If this is set to YES, then the employee is allowed to close his shift. It will close the shift and increment about 1z number. If it is set to NO, then they can't.
- Allow Reg Cancel: If set to YES, the employee is allowed to perform this negative action. If toggled to NO, it won’t even be visible.
- Allow Reg Void: This is a negative action. If this is set to NO, the employee can't see these options.
- Allow Reg Item Return: The employee is allowed to manage the return at the POS if the customer has returned the bought item, if this flag is set to YES. But if it is set to NO, an employee will not be able to proceed with returns at the POS.
- Allow Reg Price Change: This will help employees change the price temporarily, though this is always set to NO regardless of the employee’s status at the store; it is set to NO for all employees.
- Allow Reg Temp Price Change: This field also helps you change the price temporarily. Managers or cashiers are not permitted to do so.
- Do Not Allow Temp Price Change/Manual Discount Below Cost: If this flag is set to YES, the employee won't be allowed to change the price temporarily, and also they won't be able to set the manual discount below the cost price of the item.
- Allow Reg No Sale: If set to YES, the employee is allowed to perform this negative action. If toggled to NO, it won’t even be visible.
- Allow Reg Pay-Out: When turned ON, the employee is allowed to perform the pay-out action at the POS whenever required.
- Allow Reg Pay In: When turned ON, the employee is allowed to perform the pay-in action at the POS whenever needed.
- Allow Shift Recon: This allows the employee to do the shift reconciliation; if set to NO, then they can't.
- Allow Reg Safe Drop: If toggled to YES, it will allow the employee to move the money from the cash drawer to the safe to avoid the cash overflow in the cash drawer.
- Is Recon Admin: If this button is set to YES, then the employee becomes the administrator. In most cases, the cashier is not allowed to be the administrator; only the manager can become the administrator. So, this will be set to YES for a manager and NO for a cashier to edit/alter/make changes to the reconciliation.
- Allow Daily Recon: Generally, it is set to YES only for the managers because cashiers do not have this permission.
- Allow Loyalty Full Search: If set to YES, this allows the employee to search for loyalties by email address, last name, or phone number. If this is turned off, then the employee can only search through the phone number on their loyalty card.
- Allow Return Worksheet: If this option is set to YES, the data in the return worksheet can be managed by the employee.
- Allow Scan Store: This is a setting that, when set to YES, will allow the employee to use the Scan Store feature in POS.
- Allow Scan Store - Edit Cost & Price: This is a setting that, when set to YES, will allow the employee to edit the cost and price from POS.
- Allow Order Conversion: If this flag is set to YES, it allows the employees to handle the order status and convert the working order into an order from POS.
- Allow Edit Non-Working Order: If this flag is set to YES, it allows the employees to handle the order status and convert the working order into an order from POS.
- Allow Complete Orders: If set to YES, this flag will allow the employee to complete the order from POS.
- Override Blind Reg X/Z - Allow Visibility: If this flag is set to YES, the system will override the Reg X/Z blind settings, and it will allow a particular employee to view the Reg X (Sales Details) and Reg Z (Sales and Z Counter Details) from POS. If not, then the employee is not allowed.
- Override Blind Shift Recon - Allow: When this flag is set to YES, the employee is allowed to view and do the shift reconciliation. If this is set to NO, then the employee is allowed to handle shift reconciliation from the POS.
- Bypass Forced Timeclock: If this setting is set to YES, then the selected employee will be allowed to skip the clock-in step while carrying out the POS functions.
- Force DL Scan: If this setting is set to YES, then the employee must scan the driver's license (DL) of the customer before making any purchase from the POS.
- Access to All Daily Recon: This setting, when set to YES, will give the employee access to all the daily reconciliation from POS.
- Access to All Shift Recon: This setting, when set to YES, will give the employee access to all the shift reconciliation from POS.
1.3.3. Handheld Settings
These are the settings for permissions that an employee can do on an Android handheld.
Under Handheld Settings, click Modify Handheld Group Settings as highlighted in Figure 1.3.0.
- You can choose a location and click on "Add Location Settings" if you have set specific settings by location.
- Choose the applicable settings for the employee, which are described below.
- Click on "Save Settings," then "Close."
Figure 1.3.3.0
Fields:
- Allow Receiving: This is an inventory-based option that allows receiving of items if it is set to YES.
- Allow Reorder: When set to YES, it permits to utilization of the "Reorder" module from the handheld device, allowing any change, such as creating, altering, or deleting orders.
- Allow Adjustments: If this option is set to YES, an employee can manage the adjustment, which permits to create both positive and negative adjustments.
- Allow Time Clock: If this is set to YES, the allowed employee can manage time in and time out (Time Clock) and utilize time clocks within handheld devices.
- Allow Print Labels: If this option is set to YES, it gives permission to manage print labels, which permits to scan and send labels to the label queue.
- Allow Cycle Count: It gives permission to utilize the cycle counts module in handheld, allowing any change to take place, such as reviewing, deleting, or applying counts.
- Cycle Counts Blind: When set to Yes, Product QOH (Quantity on Hand) is hidden in the Order module. Instead of actual values, the system displays "N/A." When set to No, Product QOH is visible in the item detail pop-up.
- Allow Spot Check: When this field is set to YES, it gives permission to utilize the spot checks module on handheld, allowing any change to take place, such as viewing spot checks.
- Allow Transfers: If this is set to True, it will allow the employee to handle transfers from the handheld device.
- Allow Pricebook: If this option is set to YES, it gives permission to manage the price book, which gives permission to scan items and view costs, prices, and quantity on a handheld.
- Allow View Cost: If this is set to YES, the employee will be able to view the cost of the item on their handheld device.
- Hide Average Costs: If this option is set to YES, it allows management to hide average costs so that the user can remove costs from the "Products" on the handheld.
- Allow Receiving Verify: Whenever you are scanning the product, you can't see how many products you are supposed to have in the store. It is set to NO to prevent in-store theft.
- Receiving Verify Blind: When you scan the product, you don't see how many you should have. So, this is toggled to YES to avoid in-store theft.
- Allow Lottery Recon: If this option is set to YES, it allows you to do lottery reconciliation on the handheld.
- Lottery Recon Blind: If this option is set to YES, you won't see what number you are supposed to be on while doing lottery reconciliation from the handheld device.
- Allow Messages: If this is set to YES, the employee will be able to view and send dashboard messages from handheld device.
- Allow Remote Sales: If set to YES, it will allow the employee to create and view the remote sales using the handheld device at the store location.
Figure 1.3.3.1
19. Allow Delete for Reorder Items: When set to Yes, employees can delete items from a reorder list on the Handheld. When set to No, items added to reorder cannot be removed on the Handheld.
20. Allow Delete for Transfer Items: When set to Yes, employees can delete items from a transfer order on the Handheld. When set to No, items in the transfer order cannot be removed.
21. Allow Delete for Adjustment Items: When set to Yes, employees can delete items from an inventory adjustment on the Handheld. When set to No, items added to the adjustment cannot be removed.
22. Allow Delete for Receiving Items: When set to Yes, employees can delete items from a receiving order on the Handheld. When set to No, items in the receiving order cannot be removed.
23. Allow Delete for Receiving Verify Items: When set to Yes, employees can delete items during receiving verification on the Handheld. When set to No, items verified in the process cannot be removed.
24. Allow Delete for Print Label Items: When set to Yes, employees can delete items from a print label task on the Handheld. When set to No, items in the label printing task cannot be removed.
25. Allow Daily Recon: When set to Yes, employees can perform daily reconciliation tasks using the Handheld. When set to No, daily reconciliation is not available on the Handheld.
26. Allow Shift Recon: When set to Yes, employees can perform shift reconciliation using the Handheld. When set to No, shift reconciliation is not available on the Handheld.
27. Allow My To Do: When set to Yes, employees can view and complete their assigned To-Do tasks on the Handheld. When set to No, personal To-Do tasks are not accessible.
28. Allow Store To Do: When set to Yes, employees can view and complete store-wide To-Do tasks on the Handheld. When set to No, store To-Do tasks are not accessible.
1.3.4. Notes
With this feature, you can write a note related to the employee and his allowed access in the textbox given next to the Notes field.
Figure 1.3.4.0
- Then click on "Save," "Save & Close," or "Save & New" as per the need.
1.3.5. Buttons on Add New Page:
- Cancel: This button lets you discard all the changes that were made to the module.
- Report Menu Permission:
- This button allows you to set permissions for the user you are creating for different kinds of reports.
- Set the toggle to YES to grant permission to the user, else set it to NO.
Figure 1.3.5.0
- Once done, click on "Save" to save the reports menu permissions.
- Show Permissions: This button will display all the permissions allowed to all the employees for all locations.
Figure 1.3.5.1
- Save & Close: To save the changes and close/exit the current employee form, this button is used.
- Save & New: To save the changes and open up the next Add New Employee form, this button is used.
- Save: To save the changes and be on the same form, click on the "Save" button.
2. Editing New Employee
Follow the steps mentioned below to edit a new employee:
- Click the Edit button highlighted in Figure 0.1 above to edit a new employee.
- The form highlighted in Figure 2.0 will appear on your screen.
Figure 2.0
 Descriptions of all the fields is given above under the Add New Employee part. Once editing of the filled-in information is done, click "Save," "Save & Close," or "Save & New" as per the needs.
3. Deleting an Employee
You can perform this action on the Edit Employee page and also on the "Employee" module home screen.
Follow the steps mentioned below to delete an employee:
- Click the Delete button highlighted in Figure 0.1 above to delete the selected employee.
- The form highlighted in Figure 3.0 will appear on your screen.
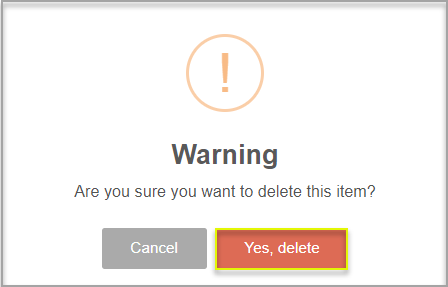 Figure 3.0
- Click “Yes, Delete” to continue the process of deleting the employee.
- Click “Cancel” to close the pop-up and skip the deletion process.
4. Mass Update
The Mass Update function allows you to make various data changes quickly and easily. You can select multiple employees and apply the following changes in a few clicks for the selected employees.
- Assign/Manage Is Manager value
- Assign/Manage Scheduler Type value
- Manage Transfer Approval Type
- Manage Employee Group
- Manage Location Assignment
Please follow the steps below to perform the Mass Update Employees functions:
- Click the "Mass Update" button highlighted in Figure 0.1 above.
- The Mass Update Employees screen will appear, as Figure 4.0 shows.
Figure 4.0
Select Employee(s): This field lets you choose the employee(s) who will be allowed to handle the modules configured for Dashboard, POS, and Handheld for the assigned location(s).
Ctrl or Shift+Left Mouse Click will help you select multiple employees at once.
Settings:
- Is Manager: Enable the preceding toggle to set the Is Manager values to update all the selected employees.
- Scheduler Type: Enable the preceding toggle to define the Scheduler Type values for all the selected employees. This usually helps in defining the employee scheduler type for employees, which is helpful in scheduling shifts for them.
Figure 4.1
- Transfer Approval Type: Enable the preceding toggle to set the Is Manager values to update to all the selected employees. You can set the scheduler type with any one of the options highlighted in Figure 4.1 below.
Figure 4.2
- No Approval Required: If this is chosen, it means the selected employees will not require approval for managing transfers.
- Corporate Approval Required: If this is chosen, it means the selected employees will require corporate approval for managing transfers.
- Store Approval Required: If this is chosen, it means the selected employees will require store approval for managing transfers.
- Employee Group: Enable the preceding toggle to select the Employee Group and assign it all the selected employees.
Figure 4.3
4.1. Location Settings
To manage the location assignment to more than one employee, the "Location Setting" section is provided at the location level. You will find the "Location Settings" (toggle) in the Mass Update Employees screen only.
Follow the steps mentioned below to apply the same settings to all employees at a location.
For the selected employees:
- Select Location(s): This field lets you choose the location(s) that are to be assigned to the selected employee(s).Figure 4.1.0
- Dashboard Setting: Turn this toggle ON to apply the configured Dashboard Settings to the selected location(s) and selected employee(s).
- POS Settings: Turn this toggle ON to apply the configured POS settings to the selected locations(s) and selected employee(s).
- Handheld Settings: Turn this toggle ON to apply the Handheld settings to the selected location(s) and selected employees.
- After tying up the locations with employees for the configured settings, click on "Process."
- The dialog box highlighted in Figure 4.1.2 appears.
Figure 4.1.2
- Click on "Update Employees" to apply the changes.
Figure 4.1.3
In this way, you can create/edit/delete an employee and configure different employee permissions location-wise.
4. FTx Academy Training Course
Click to learn how to create, edit, and assign users and employees in FTx Academy.
For a deeper understanding, check out the FTx Academy training program — enroll in the courses, explore the topic step by step, and reinforce your knowledge with quick quizzes at the end of each module.
Related Articles
Back Orders (Employees)
Back Orders Overview Back Orders displays a list of all system-generated back orders. When a vendor is unable to fully supply one or more products in a purchase order, the system records the unfulfilled quantities as back orders. A separate back ...Invoices (Employees)
Overview Receiving invoices is an efficient method for updating store inventory levels. It establishes a traceable inventory movement trail against vendors, including quantities and costs. Additionally, invoices aid in projecting inventory, which ...Order Requirements (Employees)
Overview Order requirements in retail are primarily shaped by customer demand, with the goal of maintaining efficient inventory levels, reducing costs, and maximizing profit. However, the unpredictable nature of customer demand introduces significant ...EDI Import (Employees)
Overview "EDI Import" allows you to access and process the vendor-provided EDI (electronic data interchange) files for invoices. FTx Cloud POS offers the following three options for processing invoices: 1. Apply the Invoice (Invoices Module) This ...Time Periods
Time Periods Overview "Time Periods" allows you to see the actual working hours of all your employees across various locations for the weeks that you have scheduled in the "Employee Scheduler." To learn how to schedule hours for the employees, please ...