Invoice Detail Report
Invoice Detail Report Overview
The "Invoice Detail Report" lists all items received in a date range for a specific location and vendor, giving details of each item and the invoice that it was attached to. Multiple different types of filters and sorting functionalities can be configured, depending on user requirements.
The system will display the records for invoice-related detailed information only as per the filter options applied.
Along with it, the system also displays the vendor part quantity, the UPC quantity, the cost of each product on an invoice, the total cost of all the products on an invoice, the retail price of each product on an invoice, the total retail price of all the products on an invoice, the invoice number, the UPC, the product name, the vendor part number, and the profit margin in percent.
1. Reaching the "Invoice Detail Report"
To reach the "Invoice Detail Report," follow the steps below:
- Step 1: Log into Control Center
- Step 2: Choose Point of Sale
- Step 3: Choose Reports
- Step 4: Choose Inventory Reports
- Step 5: Choose Invoice Detail Report
See Figure 1.1. You will see many types of inventory reports that will be useful to your retail business. By clicking the "Choose Report" drop-down menu, you will see the different types of inventory reports.
Figure 1.1
2. Understanding the "Invoice Detail Report"
By clicking "Invoice Detail," you will be redirected to the "Invoice Detail Report," where you can see relevant filtering and sorting options.
Figure 2.1
3. Generating the "Invoice Detail Report"
To generate the "Invoice Detail Report," follow the steps below. (See Figure 2.1 above.)
- From the "Invoice Detail Report" page, you will see the "Choose Reports" drop-down selection.
- By clicking the drop-down selection, you will see different types of inventory reports in alphabetical order.
- Search for "Inventory Report" from the list and click on it.
Select and choose the data in the following fields:
- Start Date: Pick the start date for the transfer time period.
- End Date: Pick the end date for the transfer time period.
- Store: Select the store name from the drop-down menu, mentioning the store location.
- Date Range Only: If checked, this checkbox filter will ensure that the report displays the result for the selected vendor in the vendor field and no other vendor invoice data within that date range. If unchecked, it will display the invoice data for all the vendors within the selected date range.
- Select Vendor: Pick the vendor name from the drop-down menu.
- Invoice: This field is automatically filled when the vendor is selected in the above field.
The following data gets fetched in tabular format when you click on the "Generate Report" button in the top right corner; the "Invoice Detail Report" will be displayed as highlighted in Figure 3.1.
Figure 3.1
The tabular data in the Invoice Detail Report:
- Invoice #: This column displays the invoice number of the product(s) purchased from a vendor.
- Vendor Part: This column displays the vendor part number, a unique number provided by the vendor for the product listed on the invoice.
- UPC: It is a Universal Product Code (UPC) associated with the items listed on the invoice.
- Item Name: This column displays the list of item names that have been purchased from the vendor and added to the inventory.
- Part Qty: This is actually the number of part units that are mentioned under the vendor part module.
- UPC Qty: This is the number of items that are contained in the one vendor part unit. And the UPC quantity can be calculated as Part Unit X UPC Quantity. For example, if the part unit of a vendor part is 2 and it contains 6 items in each unit, then the UPC quantity will be 2 x 6 = 12.
- Vendor Part Cost: This is the cost of the item for which the store buys the item.
- UPC Each Cost: This column displays the UPC cost per item of the items that were ordered and are on the invoice.
- Supplier Discount: This column displays the retailer's discount from the vendor. This amount may reduce the total invoice cost but doesn't affect the item's last cost.
- Supplier Deposit: This column displays the deposit fee for that vendor's part. This amount may inflate the total invoice cost but doesn't affect the item's last cost.
- Total Cost: This column will display the result of Retail Each X UPC Qty.
- Retail Each: This column displays the store selling price of the item.
- Total Retail: This column displays the Total Retail calculated by Retail Each x UPC Quantity.
- Margin: This column will define the margin percentage as Total Retail Price - Total Cost/Total Retail Price x 100.
3.1. Date Range
You can filter your sales data in the report between the dates and select a specific time from the Start Date and End Date drop-down calendars.
By clicking the Edit box, you will get the drop-down calendar to select the specific date range. You can also manually enter the date in mm/dd/yyyy format.
You can also generate a report with a specific time duration (until morning/evening), and you can select the particular time (hour and minutes) from the date selection. See Figure 3.1.1.
- Start Date: Choose the start date of the selected date range for which you want to view invoice details.
Figure 3.1.1
- End Date: Choose the end date of the selected date range for which you want to view invoice details.
Figure 3.2
3.1.1 Presets
The Presets drop-down menu is provided to select the specific duration/interval to generate the "Invoice Detail Report" according to the selected time period.
Figure 3.1.1.1
3.2. Store
This dropdown allows you to select a specific store location for which you want to view the invoice details in the report. Choosing a store helps filter the data to only include transactions that occurred at that particular location. This selection is mandatory for generating the report, as the system uses it to pull invoice data relevant to the selected store only.
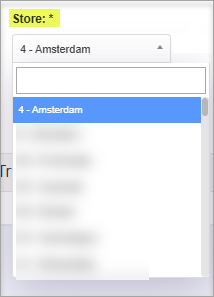
Figure 3.2.1
Figure 3.2.1
3.3. Vendor
This dropdown allows you to select a specific vendor whose invoice details you want to view in the report. Selecting a vendor helps narrow down the data to only those transactions associated with that vendor, making the report more focused and relevant. This selection is mandatory to generate the report, as the system uses it to filter and display invoice data specific to that vendor.
Figure 3.3.1
3.4. Invoices
This dropdown lets you select a specific invoice associated with the vendor you've chosen and within the selected date range. Selecting an invoice helps you drill down to the detailed line items of that particular transaction.
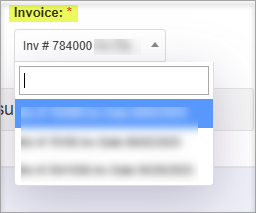
Figure 3.4.1
Figure 3.4.1
4. Checkbox Filter
Date Range Only: If unchecked, this checkbox filter will display the result report for the selected vendor and selected location, and no other vendor invoice data within that date range. If checked, it will display the invoice data for all the vendors and selected locations within the selected date range.
Without checking the filter:
Figure 4.1
- When the filter is checked:
Figure 4.2
5. Scheduling a Report
FTx Cloud POS supports report automation. You can configure a report and schedule it. The system will send the scheduled report to the indicated email IDs at the defined frequencies (daily, weekly, bi-weekly, monthly, quarterly, etc.).
6. Printing/Exporting a Report
You can print or export any report according to your requirements. When you use the Print function, the system creates and opens the report's PDF file in a new tab. You can download the soft copy or print the paper copy according to your requirements.
7. Manage Favorites
FTx Cloud POS allows quick access to the reports you need to view frequently through "Favorite Reports." You can save a report as a favorite and manage all your favorite reports from any of the report screens using the "Manage Favorites" button.
Related Articles
Invoice Detail Report - Store Employee
Invoice Detail Report Overview This report lists all items received in a date range for a specific location and vendor, giving details of each item and the invoice that it was attached to. Multiple different types of filters and sorting ...Invoice Summary Report - Store Employee
Invoice Summary Report Overview The "Invoice Summary Report" gives a basic invoice summary for all invoices in the selected date range. At first glance, this report displays the total invoice amount, surcharge amount, miscellaneous fee, prepaid sales ...Invoice Summary
Invoice Summary Report Overview The "Invoice Summary Report" shows a basic invoice summary for all invoices in the selected date range. At first glance, this report displays the total Invoice Amount, Surcharge Amount, Misc Fee, Prepaid Sales Tax, ...Non-Sellers Report
Non-Sellers Report Overview The "Non-Sellers Report" lists items not sold during the selected date range. It will also include items not ordered/invoiced but that have been transferred from the other store and not sold in the selected date range. ...Buydown Sales Report
Buydown Sales Report Overview The "Buydown Sales Report" enables you to create, schedule, and print custom reports related to buydown data based on two parameters: store sales and invoices received by the store. Manufacturers, especially tobacco ...