POS Themes
POS Theme Overview
The customized POS theme is designed to be simple and easy to use, making it fast and efficient for cashiers. With this, you can configure different color schemes to match the brand color. It also supports individual configurations that can be made for each POS terminal.
1. Reaching POS Themes
To reach "POS Themes," follow the below steps:
Step 1: Log into Control Center
Step 2: Choose Point of Sale
Step 3: Choose Other
Step 4: Choose POS Themes
By clicking "POS Themes," you can see its page. This page displays the Theme Name, Image (Thumbnail Image), POS Panels (number of panels using the adjacent theme), Created Date, Updated Date, and Actions.
Figure A
Buttons:
- Add New: This button will help you add a new POS Theme to the system.
- Edit: This button will edit the existing POS Theme.
- Delete: This button will delete the existing POS Theme.
1. Adding a New POS Theme
Follow the steps mentioned below to add a new POS Theme:
- Click the “Add New” button highlighted in Figure A above to add a new POS Theme. See Figure A.
- The form highlighted in Figure B will appear on your screen.
 Figure B
Fields:
- Theme Name: Give the name of the theme that you wish to create.
- Preset Colors: This preset setting lets you choose the color schemes for the new theme. Click on the color tab and slide on the color tab to select the color shade.
Figure C
- Theme Images: This field lets you add images to give a glimpse of how the theme will look after applying. It is also displayed as a thumbnail on the POS Theme page.
Figure D
- Theme Files: If there are any files supporting POS Theme to explain its function, they are uploaded here.
Fill in the required information in each field to add a new theme, save, and close using the highlighted buttons in Figure A.
2. Editing the POS Theme
Follow the steps mentioned below to edit the POS Theme:
- Click the “Edit” button highlighted in Figure A above to edit the existing POS Theme. See Figure A.
- The form highlighted in Figure E will appear on your screen.
Figure E
Edit the required information in the field to edit the theme, save, and close using the highlighted buttons as shown in Figure A.
3. Deleting the POS Theme
Follow the steps mentioned below to delete a POS Theme:
- Click the “Delete” button highlighted in Figure E above to delete a POS Theme:
Figure F
- Click “Yes, Delete” to continue the process of deleting the POS Theme.
- Click “Cancel” to close the pop-up and skip the deletion process.
4. Setting the POS Theme for the POS Panel
For this, you must know the current theme that is applied on your POS panel, and then the theme that is applied can be known from your POS device details.
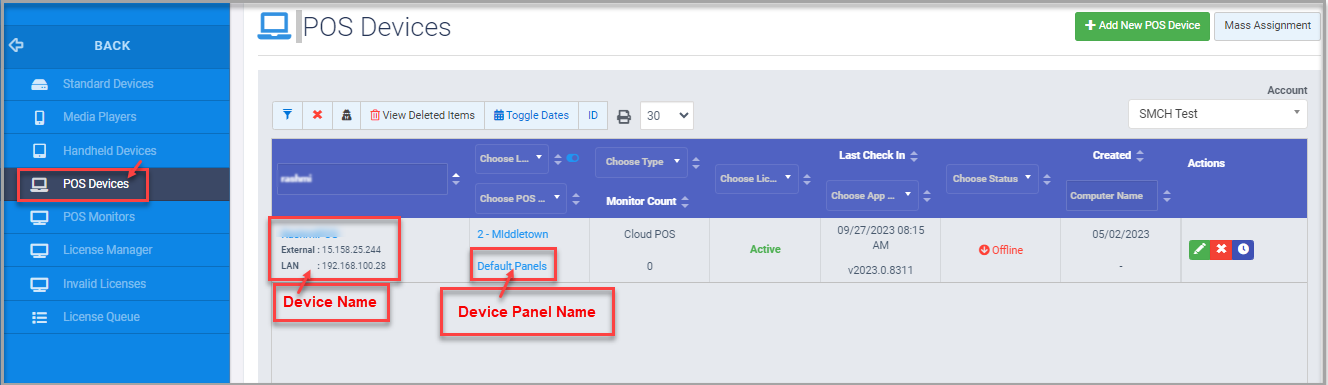 Figure G
5. Reaching the POS Panel Settings
Point of Sale>>Maintenance>>Settings & Panels>>POS Panels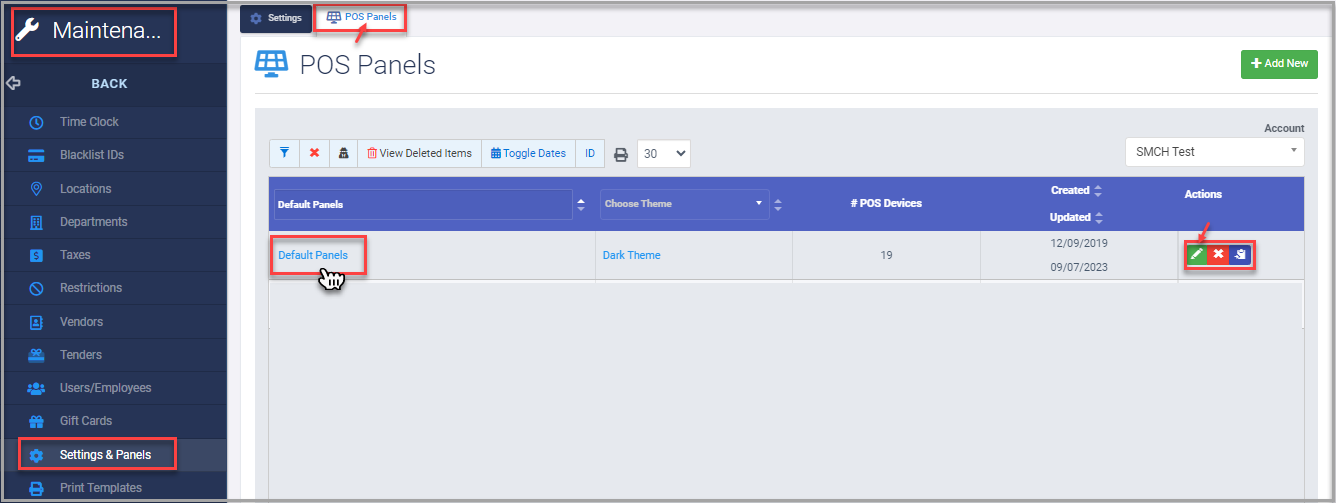 Figure H
- Click on the "Edit" button to move ahead to apply the new POS Theme. The form highlighted in Figure H is displayed on your screen.
Figure I
- Click on the "Settings Icon"
in the top right corner as highlighted in Figure I.
Figure J
1. Columns: Here, the number of columns that are to be displayed in the POS Panel is displayed.
Figure K
2. Panel Themes: All the themes that are created in the POS Themes module.
Figure L
- Select the desired theme from the list of created POS themes and click on the "Enable" button as highlighted in Figure L above.
- Once done, click on Save, Save & Close, or Save & New. The newly selected theme will be applied to your POS panel named Default Panels.
Related Articles
POS Monitors
POS Monitors Overview "POS Monitors" shows you the list of all POS monitors installed at your location(s). POS monitors are the CFD (customer-facing device) screens at the payment point in the store. They are attached to a POS device. In addition to ...POS Devices
POS Devices Overview "POS Devices" lists all POS devices configured at your location(s). "POS Devices" enables you to: Access the device information. Access the license information and activate the license if it is not activated. Enable add-on ...POS Flags
POS Flag Overview A POS Flag controls several properties of an item during the sales process by default the department level, but it can be directly applied at the item level. The POS Flag holds several unique properties such as age restrictions, ...POS Panels
POS Panels Overview "POS Panels" enables you to create POS panels that you assign to POS devices installed in your stores. The POS device installed at the payment point is hardware. It includes the POS Panel software part, which makes it functional. ...POS Flag Report
POS Flag List Report Overview POS flags allow you to add restrictions on certain sale items based on age. This report lists all POS flags, tax groups, and settings/age restrictions that are associated with them. 1. Reaching the "POS Flag List Report" ...