A Pricebook Zone acts as a container that holds the pricing and cost details for products sold across one or more stores. Each product derives its cost and price from the specific Pricebook Zone assigned to it.
This setup ensures consistency in pricing across locations that share the same zone while still allowing flexibility to maintain different pricing for different groups of stores.
By organizing products under designated Pricebook Zones, users can efficiently manage, update, and distribute pricing changes across multiple locations from a single control point.
Pricebook Zone Flow:
Pricebook Zone> Update Price & Cost in Product Master (Product Page)> Assign Pricebook Zone to Locations
1. Reaching Pricebook Zones Module
To reach the "Pricebook Zones" module:
- Step 1: Log into Control Center
- Step 2: Choose Point of Sale
- Step 3: Choose Maintenance
- Step 4: Choose Locations
- Step 5: Choose Pricebook Zones (from the header menu drop-down, see Figure 1.1).
2. Understanding the Pricebook Zones Layout
Click the “Pricebook Zones” as shown in the image above, labeled Figure 1.1. You will navigate to the list of Pricebook Zones as shown in Figure 2.1.
You will see the list of the Pricebook Zones in the grid view. If any Pricebook Zone is defined as “Default," that record will be indicated by the green tick mark.
Figure 2.1
1. Add New Pricebook: This button helps the user add a new Pricebook Zone.
2. Edit Pricebook Zone: This button helps the user modify the details of the Pricebook Zone.
3. Delete Pricebook: This button helps the user remove the Pricebook Zone.
2.1. Adding New Pricebook Zone
Follow the steps mentioned below to add a new Pricebook Zone:
- Click the "Add New" button that is highlighted in Figure 2.1 to add the new Pricebook Zone.
- After clicking the "Add New" button, the form highlighted in Figure 2.1.1 will appear on the screen.
Fields:
1. Name: Enter a unique name for the Pricebook Zone. This name helps identify the zone when assigning it to stores or updating product prices.
2. Ordering ID: Define the sequence in which the Pricebook Zone appears in lists. Zones with lower Ordering IDs are displayed first.
3. Copy From Zone: Select an existing Pricebook Zone to copy its price and cost details. This helps when creating a new zone with similar pricing structures.
4. Default Zone: Toggle this option to Yes if you want this Pricebook Zone to be the default for new products or locations that don’t have a specific zone assigned.
5. Background: Choose a background color for the zone. This color is used in large list views to visually differentiate items and easily identify which zone they belong to.
6. Action Buttons:
Preview: Click on this button if you want to see how the item listing of the Mass Update would look after selecting the background color. See Figure 2.1.2.
Figure 2.1.2
Once the details are entered, save the pricebook zone.
- Save & Close: Click on this button if you want to save the Pricebook Zone and close it.
- Save & New: Click on this button if you want to save the Pricebook Zone but also want new address details for another customer.
- Save: Click on this button if you want to stay on the Pricebook Zone page after saving the zone.
- Cancel: The Pricebook Zone will not be saved, and you will be redirected to the list of Pricebook Zones.
Once the pricebook zone details are saved, that record will be listed on the avatar page. See Figure 2.1.3 below.
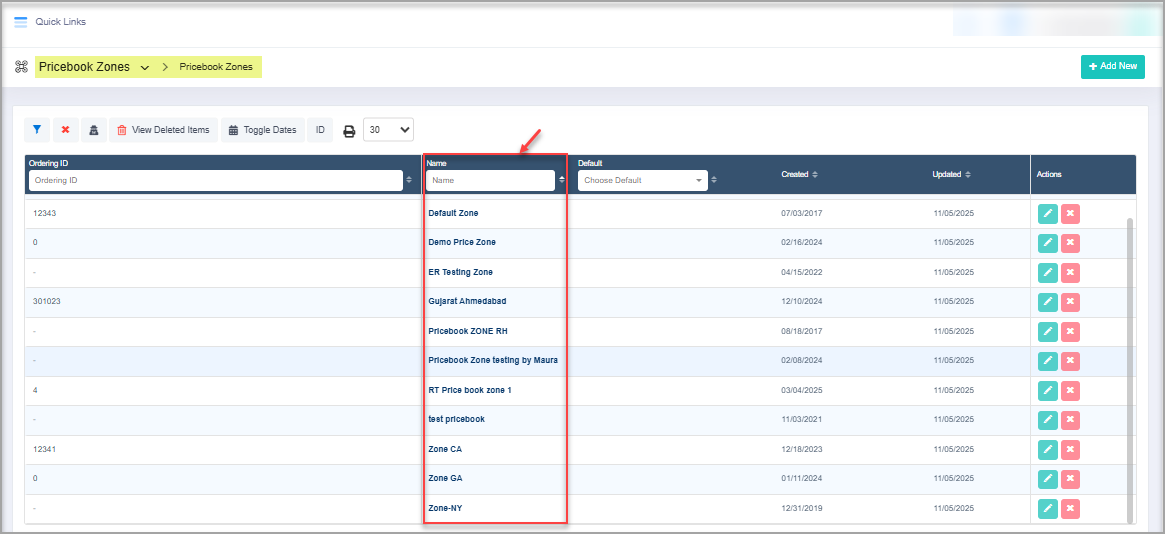
Figure 2.1.3
2.1.1. Pricebook Zone in Product Edit Page
The newly created Pricebook Zone appears on the Product Edit page, allowing the admin to set the product’s cost and price specific to that zone. Refer to Figure 2.1.1.1.
Figure 2.1.1.1
2.1.2. Assign Pricebook to Location
Once you create the new Pricebook Zone, the admin user can select it from the “Details” form of the location. See Figure 2.1.2.1.
Figure 2.1.2.1
The admin user can select the Pricebook Zone when setting up a new or existing location.
2.2. Editing a Pricebook Zone
Follow the steps mentioned below to edit/update the Pricebook Zone details:
- To edit the Pricebook Zone details, click the "Edit/Modify" button that is highlighted in Figure 2.1.
- The Pricebook Zone details page will redirect. See Figure 2.2.1 below.
- Edit/update the pricebook zone's fields accordingly.
- Delete: This button will delete the entire address record. If you click, the warning message will pop up on the screen.
Other buttons' explanations will be similar to “Adding New Pricebook Zone."
2.3. Deleting a Pricebook Zone
Follow the steps mentioned below to delete the Pricebook Zone record:
Click the Delete icon highlighted in Figure 2.1 to delete the Pricebook Zone.
- The pop-up will appear to confirm deleting the Pricebook Zone (an entire record).
See Figure 2.3.1 below.
Figure 2.3.1
 You can delete the Pricebook Zone record from its editing page as well. The confirmation pop-up page will appear in both cases.
 2.3.1. Deleting Assigned Pricebook
You cannot delete the Pricebook Zone if you have already been assigned to one or multiple locations. If you try to delete it, you will see the notification message, as shown in Figure 2.3.1.1. 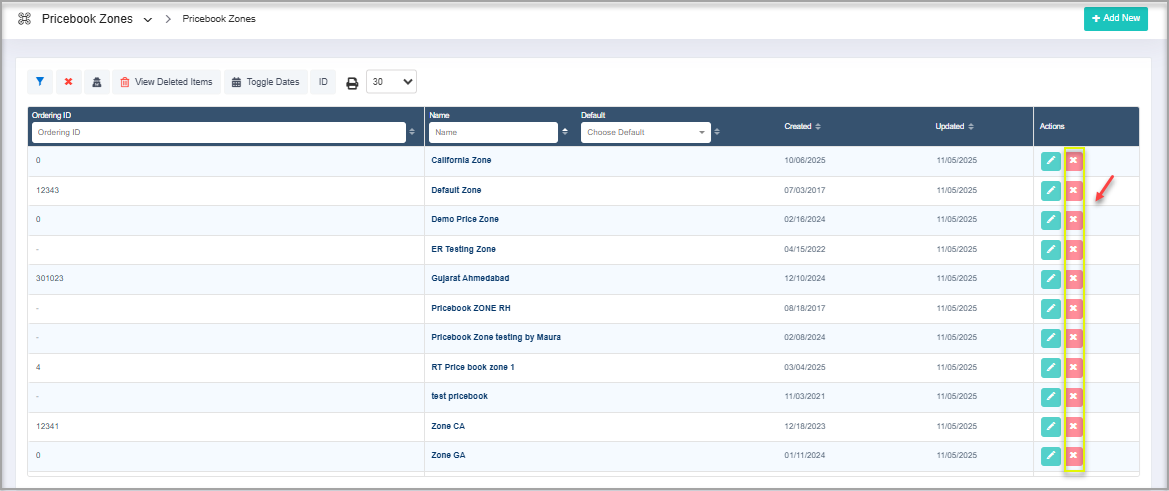
Figure 2.3.1.1
3. FTx Academy Training Course
Click here to learn how to manage locations in FTx Academy. For a deeper understanding, check out the FTx Academy training program — enroll in the courses, explore the topic step by step, and reinforce your knowledge with quick quizzes at the end of each module. Related Articles
Pricebook Zones Groups
The Pricebook Zone Groups enables users to perform mass updates on product cost, price, average cost, min/max values, and invoice or vendor part kit cost changes using Zone Groups instead of selecting individual zones each time. In this module, you ...
Navigating to Global Pricebook
Global Pricebook Overview The FTx Cloud POS "Global Pricebook" is a centralized repository designed to copy global product information across client accounts from various industries. It serves as a single source of standardized product details, ...
Manual UPC Search (Global Pricebook)
Manual UPC Search Overview Once you select an industry and navigate to the Global Pricebook screen, the system automatically displays all related products from the Global Database. On the Global Pricebook home page, you can enter the ...
Filtration - Custom Filters (Global Pricebook)
Custom Filters Overview Custom filters offer advanced search options by allowing you to filter products based on parameters like brand, manufacturer, and category. They help tailor the product list to your specific needs, making it easier to locate, ...
CSV Upload - Apply UPC Filter (Global Pricebook)
CSV Upload with "Apply UPC Filter" Overview CSV Upload allows you to upload a CSV file containing a list of UPCs. The system will automatically compare (match) each UPC from your file with the Global Pricebook database. If a match is found, the ...