Re-register Fingerprint
Re-register Fingerprint Overview
The FTx POS system allows employees to register or re-register their fingerprints using the "Re-register Fingerprint" feature. These fingerprints serve as unique digital credentials for biometric authentication, enhancing security, improving accountability, and offering a more convenient, intuitive login experience for employees.
For added protection, fingerprint data is not stored in a traditional, retrievable format, ensuring it cannot be extracted from the system.
This article covers:
How to register or re-register a fingerprint.
How to log into the POS using the fingerprint option
1. Reaching "Re-register Fingerprint"
- Step 1: Log into POS
- Step 2: Choose Action
Figure 1.0
- Step 3: Choose Re-register Fingerprint
Figure 1.1


To register or re-register your fingerprint, the POS system must be connected to a peripheral device—a fingerprint reader.
2. Understanding the "Re-register Fingerprint" Function
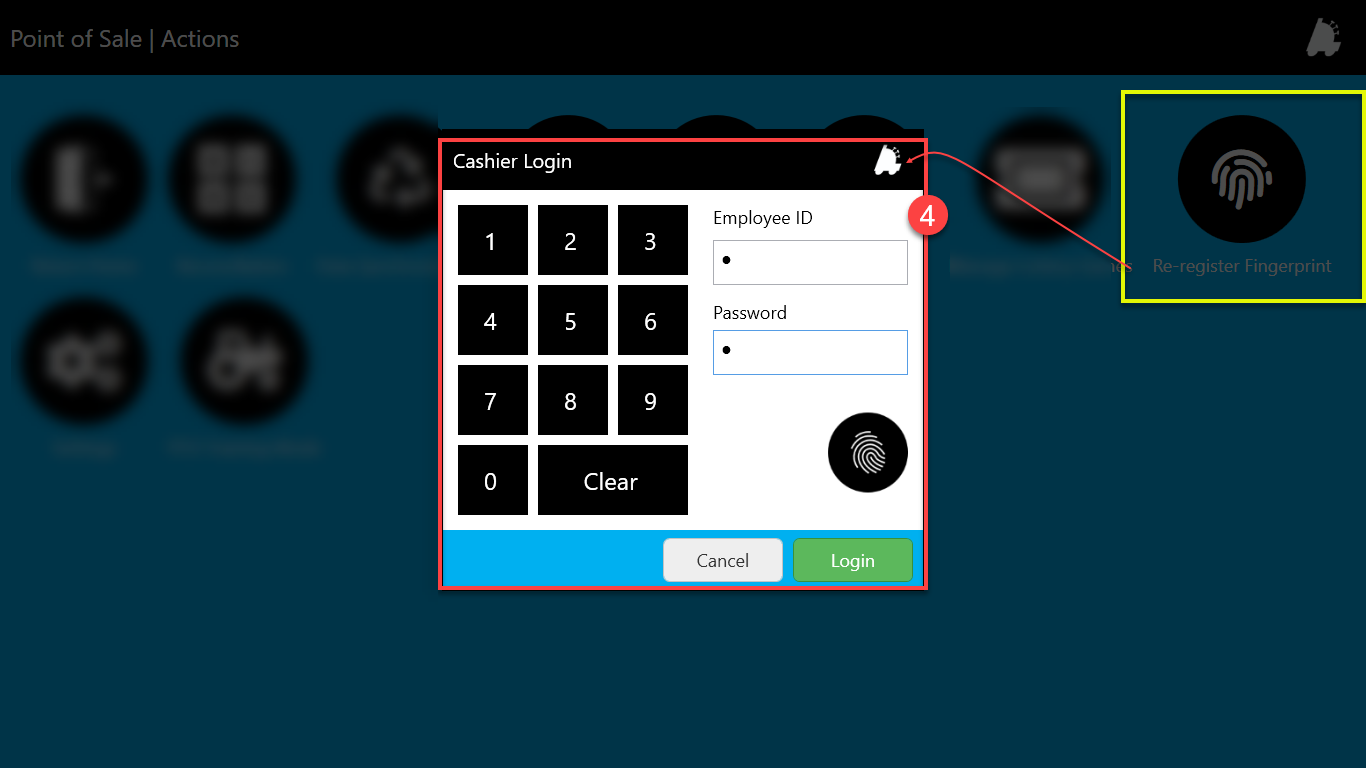
Please refer to Figure 2.1 and the description of the buttons and fields below to understand the "Re-register Fingerprint" function.

Figure 2.1
- Enter the needed credentials:
- Employee ID: Enter the numeric value for employee ID.
- Password: Enter the numeric value for the password.
- Click on the "Login" button.
- The screen will appear as shown in Figure 2.0.
Figure 2.0
- Place your finger on the fingerprint reader and scan four times as instructed in a message displayed in Figure 2.0.
Figure 2.1
- Complete all four rounds of fingerprint scanning as highlighted in Figure 2.1.
- Once done, your fingerprint will get automatically saved, and you are now ready to log in using your saved fingerprint.
2.1. Logging into POS Using Fingerprint
Once fingerprints are configured in the system, you can now log into POS as per the below-mentioned steps:
Figure 2.1.0
- Log into POS
- Click on the "Use Fingerprint" option.
Figure 2.1.1
- See Figure 2.1.1. The system will ask you to scan your finger via Fingerprint Reader.
Figure 2.1.2
- Place your finger on the fingerprint reader to scan and verify your fingerprint.
- A successful scan logs you into the POS as if you manually entered your ID and password.

Need a visual walkthrough? Watch the video tutorial here.
Related Articles
Register Settings
Register Settings Overview POS -> POS Device Global Settings -> "Register Settings" "Register Settings" are the general settings related to age verification, DL scans, sales transactions, applying coupons before/after tax, price checks, security ...Register Z Report
Register Z Report When the cashiers/employees complete their shifts, they must generate and submit the sales details report from the POS itself, known as "Register Z." They must generate Register Z before leaving the POS to close their shifts. Thus, ...Register Z Report - Store Employee
Register Z Report Overview The "Register Z Report" in FTx Cloud POS shows the summary of the Register Z performed at the POS. What is Register Z? When cashiers or employees complete their shifts, they must generate and submit a sales details report ...POS Dashboard Layout
POS Dashboard Layout Overview The POS Dashboard layout serves as the main landing page upon logging into the POS system. It provides immediate access to essential features, such as the Time Clock for clocking in and out, the Current To-Do List for ...FTx Cloud POS Step-by-Step Guide
FTx Cloud POS Step-by-Step Guide FTx Cloud POS is a cloud-based point-of-sale (POS) solution that provides comprehensive business management capabilities through a single tool, featuring extensive integration capabilities for property management ...