Register Settings
Register Settings Overview
POS -> POS Device Global Settings -> "Register Settings"
"Register Settings" are the general settings related to age verification, DL scans, sales transactions, applying coupons before/after tax, price checks, security layers, and many others that are relevant to any retail business.
 Employees (admin/manager) with permissions to use Control Center can configure the Register Settings as per the business requirements.
1. Reaching "Register Settings"
To reach "Register Settings," follow the below steps:
- Step 1: Log into Control Center
- Step 2: Click Point Of Sale
- Step 3: Click Maintenance
- Step 4: Click Settings & Panels
- Step 5: Click POS (Under "Settings")
- Step 6: Click POS Device Global Settings
- Step 7: Click Register Settings
Figure 1.1 below will help you understand the navigation better:
Figure 1.1
Note: You can reach "Register Settings" by following the path: Control Panel >> Settings >> POS >> POS Device Global Settings >> Register Settings.
2. Register Settings
You can configure the following sections under "Register Settings":
1. Safe Drop Settings2. POS Widget3. Pay In/Out Default Texts4. Misc POS Settings
Figure 2.1
2.1 Safe Drop Settings
Manage the minimum and maximum physical cash in the drawer at the POS.
- Min in Drawer: Enter the minimum cash value that should be in the cash drawer of the POS.
-> In most retail businesses, the admin managers keep the Start Till Amount and Minimum in Drawer amount equal.- Max in Drawer: Enter the maximum cash value.
-> If the cash in the drawer exceeds the entered value, an alert message will pop up to move the money to the safe to maintain the minimum cash value in the drawer.Figure 2.1.1
- Prompt Interval (Mins): Enter the minutes to prompt the message to the cashier.-> Set the interval to remind the cashier that the cash limit in the drawer has already been exceeded. The POS system will keep alerting the employee to move the cash into the safe between the entered minutes.- Max Safe Drop Skips: Set the number of maximum Safe Drop alerts that could be skipped by the cashiers.-> Once the maximum number of safe drop alerts have been skipped, you must move the cash to the safe.- Safe Drop Prompt: Enable to display the Safe Drop pop-up on the POS screen to alert the cashier to move the cash to the safe.- Disable Pop Drawer On Drops: By enabling this option, the cashier cannot open the cash drawer manually.-> This is the security option if the business owner doesn't allow the cashier to open the drawer manually. The cashier needs to ask the manager to open the cash drawer to move the cash to the safe. If this option is disabled, the cashier will get one button in the Safe Drop pop-up to open the cash drawer manually.
2.2 POS Widget
Display the following widgets on the POS panel for quick access and alerts (counting notifications):
- Show Carton Count Widget: Enable this widget to see how many cartons are left of a product.- Show Messages Widget: Enable this widget for quick access to Dashboard Messages with the counter of the unread message(s).- Show Customers Widget: Enables this widget for quick access to customers.- Show To-Do Widget: Enable this widget for quick access to the To-Do List with the counter of the to-do records.Figure 2.2.1
2.3 Pay In/Out Default Texts
Presets the messages/description for Pay In and Pay Out.
- Pay In: Enter a defined message/description for Pay In. This will show as a dropdown for the cashiers while they are adding the money into the cash drawer outside of normal sales transactions.
-> i.e., Lottery-Vendor Pays, Cash Exchange, In-House Food Bills, etc.- Pay Out: Enter a defined message/description for Pay Out. This will show as a dropdown for the cashiers while they are taking money out of the cash drawer outside of normal sales transactions.
-> i.e., Payment to lawn care, store cleaners, etc.
You can add a maximum of 10 messages/descriptions for the Pay In and Pay Out default texts.
Figure 2.3.1
 Note: Pay In & Pay Out will be counted for the reconciliation process.
2.4 Misc Settings Glossary
The following settings (flags) are related to age verification, DL scan, sales transactions, discounts, tax calculation, auto logout cashier, auto Reg Z, and many others.
Disable Weighted Barcode: If this setting is enabled, the system will ignore the retail price pulled from a specific UPC.
-> A weighted barcode is a 12-digit barcode starting with 2. It contains a retail price and is generally used in grocery store environments.
Logoff Cashier After Sale: By enabling this setting, the cashier/employee will be logged off immediately from the POS after completing each sales transaction.
Allow Visual Age Verify: Enable this setting to display a bypass button on transactions involving age-restricted items.
-> If this option is enabled, the POS system will display a button and allow the cashier to bypass scanning an ID or entering a birthdate.
-> If this option is enabled, the POS system will display a button and allow the cashier to bypass scanning an ID or entering a birthdate.
Return to Main Screen: Enable this setting to return the cashier to the main panel after completing each sales transaction.
Disable Buydown/Promotion in Pricecheck: Enable this setting if you do not want to display the buydown/promotion details during the price check.

Cashiers will not be able to see the Buydown Name, its Amount, and Promo Name on the Price Check page if this option is enabled.
Do Not Pop Drawer For $0 Sales: Enable this setting if you do not want to open the cash drawer after completing the item sale with a balance of $0.
This is the security option to prevent theft from the cash drawer.
Returns Use Current Discount: Enable this setting to use the current system discounts on item returns, even when returning against a receipt.
If this option is enabled, the refund amount of the returned items will be paid back at the current price of the item. If this option is disabled, the customer will get the full amount for a returned item that is printed on the receipt.
Prompt For Price On Return: Enable this setting to prompt for editing the item price on returns to allow the cashier to alter the value.
-> If this option is disabled, the Price Prompt will not appear on the screen. Generally, this option is disabled by business retailers/owners to prevent theft by editing the item price.
-> If this option is disabled, the Price Prompt will not appear on the screen. Generally, this option is disabled by business retailers/owners to prevent theft by editing the item price.
Figure 2.4.1 "Misc POS Settings"
Prompt For Out of Stock Item: Enable this setting to prompt on the screen to notify the cashier when the item is out of stock.
Prompt For Name When Suspending Sale: Enable this setting to prompt on the screen to enter the name of the suspended sale as an identifier. (In most businesses, this option is kept enabled.)
Automatically Partial Tender Gift Card: Enable this setting in the case when a gift card is used as a tender and the gift card balance is less than the transaction total; it will automatically use the balance available on the gift card towards the transaction and then display the remaining balance.
Restrict Lotto Sales Tenders: Enable this setting if you want to restrict the lottery (online) tender during sales. (Lottery sales tender to cash only).
Show Min Date/Age: Enable this setting to display the age value on the POS by setting up labels for the minimum age date and its value (description).
Combined Identical Items: Enable this setting to combine multiple scans of the same item into a single line with a quantity equal to the number of times scanned.
-> This setting is useful for shortening the receipt details and saving the receipt paper. Most business retailers keep this option enabled.
Required Description On Open Dept Sales: Enable this setting to require the cashier to enter a description when selling Open Department items, which typically have no UPC and/or no inventory details.
POS Behavior
- During checkout, when an Open Department item is added:
- The system prompts the cashier to enter a description.
- The item cannot be completed without entering valid notes.
- The description is stored as a record of the Open Department sale and is available in receipts and reports.
Purpose:
Ensures sales details are captured for items without UPC or inventory tracking.
Ensures sales details are captured for items without UPC or inventory tracking.
Figure 2.4.2 "Misc POS Settings"
Required Description on Open Pricing Sales:
When the Setting is Enabled:
- Cashiers are required to enter notes for every Open Pricing item.
- After entering the price, the POS displays an Open Pricing Sale Notes pop-up.
- The cashier must either select a predefined note or enter a custom description.
- The item cannot be added to the sale until valid notes are entered.
- The pop-up displays the "Cancel" and "Ok" buttons.Figure 2.4.3
- Cancel prevents the item from being added to the sale.
- Notes must follow existing Open Department Notes validations, including:
- Minimum of five characters
- No leading or trailing spaces
- When the Setting is Disabled
- Notes are optional for Open Pricing items.
- After price entry, the Notes pop-up is displayed with a dropdown and keypad.
- The cashier may proceed with or without entering notes.
- The pop-up displays the "Skip" and "Ok" buttons.
Figure 2.4.4
- Skip allows the sale to continue without notes.
Predefined Notes Setup
- Enabling the setting activates a Setup option.
Figure 2.4.5
- Selecting "Setup" opens the Notes for Open Pricing Sale pop-up.
Figure 2.4.6
- Users can configure up to ten predefined notes.
- These notes appear in the Description drop-down during the transaction.
Reporting and Receipt Behavior
- Entered or selected notes are:
- Printed on the receipt
- Displayed in the E-Journal report
- Notes follow the same behavior as existing Open Department Notes.
Logoff after # Minutes Of Activity: Enable this security setting to log off the cashier after a specific idle time period.
- Logoff After # Minutes: Enter the minutes of the maximum idle time period.
-> When the system becomes idle for a preset number of minutes, it will log the cashier off from the POS automatically.
Auto Cancel Suspended Sales: Enable this security setting to auto-cancel suspended sales after the maximum time period.
Auto Cancel Suspended Sales: Enable this security setting to auto-cancel suspended sales after the maximum time period.
Auto Cancel Suspended Sales After # Hours: Enter the hours of the maximum auto-cancel wait time period.
-> When the customer has not returned within the preset number of hours, the suspended sale will be canceled.
Show Message for Manager/Employee Overrides: Enable this setting to allow a cashier to add a note/message when the manager requires access to the transaction or any such action that is being performed at the POS. The override options/pop-up will show the "Skip" button so the cashier can skip entering the message/notes.
- Force Message for Sales License Overrides: If you do not wish for the cashier to be able to bypass leaving a message, turn this toggle "ON."
Enable Auto Clock Out: Enable this setting to clock out the cashiers automatically at a specific time.
- Enable Auto Clock Out At: Select the specific time for auto-clocking out.
Enable POS Clock Out Z Timer: Enable this setting to prompt the clock-out when the cashier performs the Shift Reconciliation.
- Z Timer Clock Out Type: You can see these 4 options in the drop-down:
- Force appears immediately after Z | Force After # Minutes | Optional appears immediately after Z | Optional After # Minutes:
Select the relevant option for clocking out forcefully or optionally after the Shift Reconciliation. If you select "Force/Optional After Minutes," you need to set the minutes to clock out after Reg Z.
Enable Time Clock Open Z Warning: Enable this setting to prompt the Time Clock when the cashier performs the Shift Reconciliation.
- Manager Override Required: When you enable the Enable Time Clock Z Warning settings, the Manager Override Required setting will appear. Enable this button to make the manager's override mandatory.
Figure 2.4.7 "Misc POS Settings"
Tax Manufacturer Coupons: Enable this setting to apply the taxes on the item before the manufacturer coupon is applied to the retail price.
Apply Excise Tax Before Buydowns: Enable this setting to apply and calculate the excise tax on the item before the buydown is applied to the item's price. The excise tax will be calculated on the actual retail price without the buydown adjusted into it.
Tax Buydowns: Enable this setting to apply the taxes on the buydown itself.
Visual Age Verify Text: Enter the text (description) for the visual age verification label that will bypass the age verification as per the customer's visual.
-> This setting is only visible if Allow Visual Age Verify is enabled.
-> This setting is only visible if Allow Visual Age Verify is enabled.
Force License Scan When Age < X: Enable this setting to make the scanning of licenses mandatory for selling age-restricted products.
When you enable this setting, the two settings below will appear.
-> Force License Scan # Age: Please specify the age in it.
-> Allow Manager Override on Force License Scan # Age: Enable this setting if you want the manager to be able to override the mandatory license scanning.
Tax Store Coupons: Enable this setting to apply the taxes on store coupons.
Let's understand the calculation for 22. Tax Manufacturer Coupons | 24. Tax Buydowns | 27. Tax Store CouponsManage the setting to decide when to apply the tax, whether before the coupon is applied or after the coupon is applied.
Ex., A Product Retail Price is $10; The Tax is 10%. Let's understand Manufacturer Coupons | Store Coupons | Buydowns.
If the flag is enabled, the tax will be calculated before a coupon is applied | If the flag is disabled, the tax will be calculated after a coupon is applied |
Sub Total: $ 10 | Sub Total: $ 10 |
1.-> 10 % tax is applied, so $11 | 1.-> $ 1 coupon is applied, so $9 = $[10-1] |
2.-> $ 1 coupon is applied $ [11-1] | 2.-> 10% tax is applied, 9*10 % = 0.90 |
3.-> So, the Total Due: "$10" | 3.-> So, the Total Due: "$ 9.90" |
Conclusion: Tax is calculated on the retail price first | Con.: Coupon is calculated on the retail price first |
 Note: The tax rate calculation depends upon the state jurisdiction of when and where the coupons are applied.
Allow Over Tender Store Coupons: Enable this setting to allow over-tender store coupons.
Do Not Keep Age For Suspended Sale: Enable this setting if you don't want to keep the age for a suspended sale.
Do Not Show Zero Dollar Kit Items: Enable this setting if you don't want the system to show zero-dollar kit items.
Prompt For Notes On No Sale: Enable this setting to prompt the cashiers to enter the reason/note why they performed the "No Sales" action from the POS.
-> Click "Setup" to enter your notes. The notes you provide will be available as drop-down options, allowing the cashier to select the reason for no sale.
Prompt For Notes On Cancel Sales: Enable this setting to prompt the cashiers to enter the reason/note why they performed the "Cancel Sales" action from the POS.
-> Click "Setup" to enter your notes. The notes you provide will be available as drop-down options, allowing the cashier to select the reason for canceling the sale.
Prompt For Notes On Voids: Enable this setting to prompt the cashiers to enter the reason/note why they performed the "Void Sales" action from the POS.
-> Click "Setup" to enter your notes. The notes you provide will be available as drop-down options, allowing the cashier to select the reason for voiding the item or sale.
Figure 2.4.8 "Set up Note/Reason for No Sales, Cancel Sales, & Void Sales Actions"
Note: For the above 31, 32, & 33 settings, you can set up the (predefined) reasons/notes to provide the selection to the cashier while performing these actions at POS.
These 3 settings are also known as Negative Sales.
Price Change Text: Enable this setting to prompt the cashier to enter a note/reason why they performed the "Price Change" action to change the item's price manually. (Price Override)
-> You can set up the note/reason (pre-recorded) to provide the selection to the cashier while performing the "Price Change" action at the POS.
Show Qty On Hand: Enable this setting to display the quantity on hand for items on the price check screen of the POS.
Pricecheck Hide Tax: Enable this setting to hide the tax details on the POS's price check screen.
Pricecheck Show Cost: Enable this setting to display the cost of the item on the POS's price check screen. The cost of the item will be displayed along with margin % details.
Prompt For Item on Manuf Coupon: Enable this setting to prompt the item list after scanning a manufacturer coupon.
-> Only those items will be listed in which the Manuf Coupon is applicable.
Figure 2.4.9 "Misc POS Settings"
Subtract Percent Disc After System Disc: Enable this setting if you want to subtract a manually entered discount by a cashier after a system discount is applied/calculated (order of operations).
Require Driver's License Validation: Enable this setting to force the cashier to check and validate the scanned driver's license.
-> After scanning a driver’s license, show the details to a cashier to verify the ID information, such as name and age and how many days until expiration, and need to either accept or reject.
-> After scanning a driver’s license, show the details to a cashier to verify the ID information, such as name and age and how many days until expiration, and need to either accept or reject.
Force Driver's License for Loyalty Lookup: Enable this setting if the DL verification is mandatory for the loyalty programs to identify the customer.
Prompt for Missing Loyalty Customer Upon License Scan: Enable this setting if you want the system to prompt for the missing loyalty customer upon license scan.
Prompt for Unread Messages: Enable this setting if you want to enable the prompt for unread messages after some interval. By enabling this setting, the below setting will be visible:
- Interval for Unread Messages #Minutes: Enter the minutes to prompt for unread messages after that time interval.
Age Restricted Store: If the store is intended to be used only by people of a specific age or higher, set this toggle to YES. This is done to add the minimum age to restrict minors from buying from the store.
-Min Age: This field lets you set the age limit for the customers who are coming to the store.
Prompt for CFD on Item Scan Age Verification: Turning this toggle ON will also prompt the customer on the (customer facing display) CFD to verify their age by providing an ID proof, such as a Driver's License, to buy age-restricted items.
Show Excise Tax & Occupational Tax on CFD: Enable this setting if you want to show the excise tax and occupational tax details on CFD.
Figure 2.4.10 "Misc POS Settings"
Allow Manager Override on Expired License: Enable this setting if you want to provide the authorization only to the manager to complete the transaction in case the customer's scanned DL is already expired.
Force DL Scan For Age Verify: Enable this setting if you want to allow the customers to purchase age-restricted items only after scanning the DL to verify the age.
-> If this option is enabled, the customer will not get the age verification bypass button; therefore, the DL must be scanned to complete the transaction. By enabling this option, the override option below will be visible with the disabled setting by default.
- Force DL Scan for Age Verify Allow Override: If this option is enabled, only the manager's authority is allowed to complete the sales by overriding the Force DL Scan For Age Verify.
Note: If the "48. Force DL Scan For Age Verify" setting is enabled, immediately the "3. Allow Visual Age Verify" and "25. Visual Age Verify Text" settings will be disabled.Prioritize DL scan Age Verify: Enable this setting to provide the flexibility of age verification, whether by scanning the customer's DL or entering the customer's DOB manually.
Note: If you want to force DL by enabling the "46. Force DL Scan For Age Verify" settings, this setting (Prioritize DL Scan Age Verify) will be disabled.Prompt for Loyalty as First Item Scan: Enable this setting to prompt for a loyalty customer when the first item is scanned for a new customer after the previous sales transaction is completed. When enabled, the POS will prompt the cashier to identify or select the loyalty customer as soon as the first item is scanned or entered manually using any item entry button, ensuring the transaction is linked to the correct loyalty account.
Discount Child When Parent Qty Sold: Enable this setting if you want to calculate a discount for a subunit (child item) when the quantity purchased equals the purchase unit (parent item) quantity, in case the price is different (packs cost more than cartons).
-> The customer will get a similar retail price to the purchase unit on purchasing the sub-units.
Do Not Allow System Discounts with House Acts: Enable this setting if you don't want to apply the system discount when an item is being sold to the house account.
-> The retail price for selling the item to house accounts could be less than the actual retail price. So, by enabling this option, the retailer would avoid the multiple discounts to house accounts and save some money.
Do Not Allow System Discounts with Temp Price Change: Enable this setting if the system discount will not be applicable when the cashier manually changes the retail price (price override) from the POS Panel.
-> Most retailers keep this setting enabled to prevent money loss by applying discounts to manually reduced retail prices.
Auto Z Register Window: Enable this setting to schedule time for register Z’s automatically. Decide the duration for which the reg z will automatically be out.
1. Auto Z Register Window From: Schedule the time from when to start for the Auto Z Register out.2. Auto Z Register Window To: Schedule the time till when the auto z register timing is to be ended.
Use Return Forms: Enable this setting if you want to make the customer's details mandatory on item returns.
-> The cashier is required to fill up the form with reasons for return to keep track of all returns by the specific customer.
Force JUUL Sale Limits/Sale: When Force JUUL Sale Limits/Sale is enabled, the POS strictly enforces all JUUL-mandated quantity rules. Cashiers cannot sell more JUUL products than the allowed limit, and the system will block the transaction if the limit is exceeded. No manual entry or override is permitted unless a manager with the proper permissions approves it. This ensures the store stays compliant with JUUL’s required sales restrictions.
When this setting is disabled, the POS does not enforce any JUUL-specific limits. Cashiers can sell JUUL items without restrictions, and the system will allow any quantity to be added to the transaction. The sale proceeds normally without triggering a limit check.
JUUL is an e-cigarette product of the US. Because of underage use, the US government forced a mandate that JUUL follow certain limits for sales.Excise Tax Applied To: Select a relevant option from the drop-down to apply the excise tax to the retail Price or Cost.
Go to shift recon after performing Reg z: Select a relevant option from the drop-down to indicate whether you want to navigate the cashier directly to the "Shift Reconciliation" page or provide the selection after performing the Reg Z. The drop-down selection: Not Enabled (no action) | Go Directly To Shift Recon | Prompt User With Selection.
Set Min Label and Age: Enter the min age value and its label to display the age verification details on the POS.
Allow Sale of Item If Price is 0.00: Enable this setting if you want to allow the cashiers to sell an item at a $0 retail price.
-> Most retailers keep this option disabled. But, in some cases, items are "sold" for $0 just for maintaining the inventory & report purposes; this option can be enabled.
Disable JUUL Manager Req: Enable this setting if you want JUUL items to be sold without requiring manager approval.
When this option is turned on, the system removes the manager-authorization prompt for JUUL products, allowing cashiers to complete the sale normally.
The following screen will appear, requiring either an ID scan or a manager override before the age-restricted item can be sold.
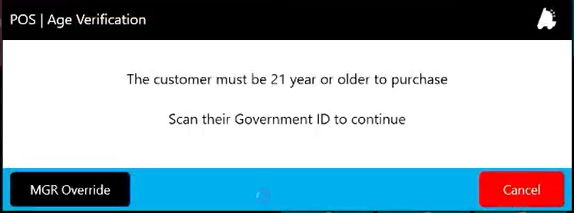
Figure 2.5.0 "Misc POS Settings"
Price Check Disallow Adding Item to Sale: Enable this setting if you want to avoid items from being added to the sale during the price check. The cashiers will not get the option to add the items to sales from the price check page.
Disallow Item Multiplier In Price Check, Item Search, and Receipt Edit Screens: Enable this setting if you want to disallow the scanned items by multiplying them manually from the POS panel. Enabling this setting disables manual item multiplication on the price check, item search, and receipt edit screens.
Discount Before Subtotal: Enable this setting to show the discount before the subtotal.
Force Description on Failed UPC Scan: Enable this setting to make it mandatory for the cashier to enter the description for a failed UPC scan. This is useful for corporations to ensure that items are scanning correctly.
Allow to Update License Number: Enable this setting if you want to allow the cashier at the POS to update the customer's license number in the system. When the customer is added without the DL number, the cashier at the POS can add/update the DL of the customer in the system only when this setting is enabled.
Enable FTX Identity Verification: Activate this setting to enable the FTx Identity Verification function.
Enable FTX Identity Facial Recognition: Activate this setting to enable the FTx Identity Facial Recognition function.
Show Full Identity Last Name: Enable this setting if you want the system to show the last name.
Verify MM/DD on Single Identity Returns: Enable this setting if you want to verify the MM/DD on a single identity return.
-> After managing and configuring the settings, click the "Save & Close" or "Save" button to save the register settings.
Note: Register Settings will be applied globally, which means they will be applied to every store (location) for the specific account for which you have logged in. But, you can also configure these settings at the store level for the individual stores (locations). For that, reach the "Locations" module. Edit the location (store) and click "Manage POS Settings" to configure the different POS Settings rather than applying the POS Device Global Settings. So, you can override POS Device Global Settings for any store as per retail business requirements.3. FTx Academy Training Courses
For a deeper understanding, check out the FTx Academy training program — enroll in the courses, explore the topic step by step, and reinforce your knowledge with quick quizzes at the end of each module.
Related Articles
Notification Settings
Notification Settings Overview "Notification Settings" lets you configure the notification rules related to the POS device's inactivity. You can decide who receives a notification when there has been no activity on the POS devices at your stores for ...Loyalty Settings
Loyalty Settings Overview The POS Loyalty Settings help you define how the loyalty customers are recognized and engaged during the checkout process. These settings allow you to manage how loyalty transactions are handled for your customers, including ...Other Settings
Other Settings Overview POS -> POS Device Global Settings -> "Other Settings" You can manage and configure the general settings related to specific actions at POS regarding Register Z, Clock In/Out, Time Clock, House Account Vendors, and ...Register Z Report
Register Z Report When the cashiers/employees complete their shifts, they must generate and submit the sales details report from the POS itself, known as "Register Z." They must generate Register Z before leaving the POS to close their shifts. Thus, ...Control Center Settings – Modern
1. Overview "Control Center Settings" shows the basic information about POS, such as Store Number, Register Number, Device ID, and Location. Initially, "Control Center Settings" created a link between the POS device and the Control Center. However, ...