Invoices
Invoices Overview
Receiving invoices is an efficient method for updating store inventory levels. It establishes a traceable inventory movement trail against vendors, including quantities and costs. Additionally, invoices aid in projecting inventory, which assists in forecasting future sales.
There are three methods to create an invoice in Control Center:
- You can convert a Purchase Order into an Invoice.
- You create an invoice manually with the "Add New" button.
- You can import an invoice via Import Invoice EDI.
The "Invoices" tab under Receiving in the "Inventory" module enables you to:
- View the list of invoices.
- Add a new invoice.
- Apply an invoice.
- Editing or deleting an invoice is possible until the invoice is applied.
- Copy an invoice record.
- Update cost changes in the system.
Reaching "Invoices"
- Step 1: Log into Control Center
- Step 2: Choose Point of Sale
- Step 3: Choose Inventory
- Step 4: Choose Receiving
- Step 5: Choose Invoices
Please see Figure 0.1 to understand the navigation better.
Figure 0.1
Understanding the "Invoices" Layout
Please refer to Figure 2.1 and the descriptions of the buttons and fields below to understand the layout of "Invoices."
Figure 0.2
1. Add New: This button lets you add a new invoice.2. EDI Import: This button will navigate you to the EDI Import screen. To learn more about the EDI Import screen, please read the EDI Import article.3. Run Batch EDI Job: This button helps import all invoices for multiple locations and vendors for a single account. When you click this button, the system initiates the batch EDI job and shows a success message, as Figure 0.3 shows. The email address(es) you mentioned in the Add custom emails to receive inventory notifications field (Control Center >> Point of Sale >> Maintenance >> Settings & Panels >> Settings >> POS >> Inventory >> Advanced Receiving Configuration >> Add custom emails to receive inventory notifications) will receive the emailed results.4. Manage Settings: This button navigates you to the Inventory Settings screen of Control Center.5. Edit Invoice: This button lets you edit the invoice.6. Apply Invoice: This button lets you apply the invoice. Applying an invoice updates the inventory quantities, item costs (if applicable), and other related inventory information based on the invoice details.7. Delete Invoice: This button lets you delete the invoice.8. Print Invoice: This button lets you print the invoice.9. Copy Invoice: This button lets you copy the invoice.10. View Notes: This button lets you view any notes added to the invoice. It will show all notes added to the invoice, information about the user who added them, and timestamps.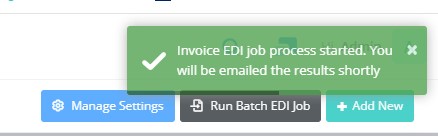 Figure 0.3
Filtering Invoices by Extraction Status
On the Invoices listing page shown in Figure 0.2, you can find a filter “Choose Extracted.” This filter allows you to filter the invoices based on their extraction status. By default, no filter is selected, and all invoices are displayed.
The invoice list displays an icon indicating the current Extracted status for each invoice:
- Green Check Mark: Invoice is marked as Extracted.
- Red Cross: Invoice is marked as Not Extracted.
You can update the Extracted flag directly from the invoice list. To change the status:
- Navigate to the Invoices page.
- Locate the invoice.
- Click the Extracted status icon.
- The system immediately toggles the status between:
- Extracted and Not Extracted
- Yes and No
- The icon is updated to reflect the new status.
1. Adding a New Invoice
Follow the steps mentioned
below to add a new invoice:
- Click the “Add New” button highlighted in Figure 0.1 above to
add a new invoice.
- The Create Invoice screen will appear, as Figure 1.1 shows.
Figure 1.1
Fields:
- Location: Select the location of the store from the drop-down list.
- Vendor: Select the vendor for whom the invoice is generated.
- Invoice No: Enter the invoice number. Each invoice should have a unique number. You can keep the same invoice number for another vendor, but not for the same vendor. Generally, the vendor will provide you with an invoice number, which you should use.

An invoice number cannot be reused for the same location, as this will cause an error.
- Notes: Enter the notes if required.
- Invoice Date: Select the invoice date. The system shows the current date by default, but you can change it if necessary. When you click on this field, a calendar drop-down will appear. You can select the required date from it.
- From PO: Enable this flag if creating the invoice from a purchase order. If you enable this button, the Purchase Order drop-down will appear, showing the list of purchase orders for the selected vendor, as Figure 1.2 shows. Select the appropriate vendor from the drop-down.
Figure 1.2In this case, the system will fetch all items and their respective details from the purchase order and show them on the invoice. The invoice will list all previous costs and quantities. Therefore, if there is a discrepancy between the invoice and order quantities or the invoice and order costs, the system will detect and highlight it, allowing you to address the error.
- Surcharge: Enter the surcharge amount that the vendor has applied.
- Type: Select the invoice type from Standard Invoice and Negative Invoice.
1) Standard Invoice: This type of invoice adds up products for the store.2) Negative Invoice: Select this option if the products are removed from the inventory or if it’s a vendor return for expired/damaged products.Buttons:
- Cancel: This button lets you cancel any changes made to the invoice.
- Save & Close: If you click the "Save & Close" button, the system will save the invoice and navigate you to the Invoices screen.
- Save & New: If you click the "Save & New" button, the system will save the invoice and open the new Create Invoice screen, where you can add another invoice.
- Save: This button lets you save the changes you have made at any point. You will remain on the same invoice.
- Once you enter the appropriate information and click the "Save," "Save & Close," or "Save & New" button, the system will create the invoice.
- If the invoice is created from a purchase order, it will have the product details, as Figure 1.3 shows. The system will highlight cost changes or discrepancies in the order quantity in yellow, if any. You can edit it if required.
Figure 1.3
- If the "Append store # to Invoice when creating Invoices" and "Postpend Date to Invoice # When Creating Invoices" settings are enabled in "Inventory Settings," the invoice number will be allocated accordingly.
- If the invoice is not created from a purchase order, it will be a blank invoice, as Figure 1.4 shows. You need to add products to the invoice. 3.1 Adding Products to Invoice explains the details.
Figure 1.4
1.1 Adding Products to the Invoice
You can search for and add any product to the invoice. If the "Track Inventory" setting is set to "No" for a product at the product level, the system will allow you to add that product to the invoice. However, once you apply the invoice, the system will not update the quantity of that product in the inventory.
Please follow the steps below to add products to the invoice:
- Click the "Add" button highlighted in Figure 1.4.
- The Add/Update Product screen will appear, as Figure 1.1.1 shows.
Figure 1.1.1
Add/Update Product Fields:
- Vendor Part: To search for a product by its vendor part, input the vendor part number and press the Enter key on your keyboard.
The Select One Product screen will appear, as Figure 1.1.2 shows.
- Search for a product by entering its name, UPC, or vendor part, or by selecting a category or manufacturer, then click "Search."
- Use the Delete (X) icon to clear all search fields and start a new search.
- The system displays matching products; click a product name to select it.
- Click "Apply" to confirm your selection.
The fields or buttons described below are utilized after selecting a product using any of the fields above.Add/Edit Product and Vendor Part ActionsThe Add/Update Product window provides quick access to product and vendor part maintenance directly from the invoice screen. Users can create or edit products and vendor parts without navigating away from the invoice workflow.Depending on product availability, vendor part availability, and the Allow Items Without Vendor Part setting located at:POS → Inventory Settings → Advanced Receiving Configuration: the system dynamically displays the appropriate action buttons.If Product Exists but No Vendor Part ExistsWhen Allow Items Without Vendor Part is enabled:
- Products with vendor parts and products without vendor parts are available in the Select Product search results.
- If a selected product does not have an associated vendor part:
- The Create Product button changes to Edit Product.
- The Create Vendor Part button remains available.
Edit Product
- Opens the selected product's Edit Product page in a new browser tab.
- Allows users to modify product details.
Create Vendor Part
- Opens the Create Vendor Part page in a new browser tab.
- Automatically populates:
- Item with the selected product.
- Vendor with the vendor associated with the invoice.
Product Exists and Vendor Part ExistsWhen a selected product already has a vendor part associated with the invoice vendor:
- Create Product changes to Edit Product.
- Create Vendor Part changes to Edit Vendor Part.
Edit Product
- Opens the Edit Product page in a new browser tab.
Edit Vendor Part
- Opens the Edit Vendor Part page in a new browser tab.
- Automatically loads the selected product and vendor information.
Product Does Not ExistIf the searched product cannot be found:
- Only the Create Product button is displayed.
- Vendor Part actions are not available.
Create Product
- Opens the Create Product page in a new browser tab.
- Allows users to create a new product directly from the invoice workflow.
Product Search BehaviorWhen Allow Items Without Vendor Part is disabled:
- Only products that have vendor parts are displayed in the product search results.
- Products without vendor parts cannot be selected.
When Allow Items Without Vendor Part is enabled:
- All products are displayed, regardless of whether a vendor part exists.
Vendor Part Search BehaviorUsers can enter a vendor part number directly into the Vendor Part field and press Enter.If a matching vendor part is found:
- The associated product is loaded automatically.
- The system displays the appropriate Edit Product and Edit Vendor Part actions.
If a matching vendor part cannot be found, the following message is displayed:"We could not find a vendor part matching that part number for this vendor."Figure 1.1.3Available actions:Create Vendor Part
- Opens the Create Vendor Part page in a new browser tab.
- Automatically populates:
- Item with the selected product.
- Vendor with the invoice vendor.
Close
- Closes the message and returns the user to the Add/Update Product window.
Product Selection BehaviorSelecting a ProductWhen selecting a product through Select Product:
- Products are displayed together with vendor parts associated with the invoice vendor.
- If multiple vendor parts exist for the same product:
- Each vendor part is displayed on a separate row.
- Users can select the appropriate vendor part.
Searching by UPCWhen searching by UPC:
- The system displays the matching product and vendor part.
- If multiple vendor parts exist for the invoice vendor:
- The earliest created vendor part is selected automatically.
- The primary vendor part is not prioritized.
- Part Qty: Enter the part quantity you need to add to the invoice. You can also add child items to the invoice.
- Switch to Child: If the parent has a child product, this allows the user to toggle from the Parent product to its associated Child product so the invoice can be created against the child item instead of the parent.
Figure 1.1.4- UPC Qty: The system will calculate the UPC quantity based on the part quantity entered and display the result. However, you can update the UPC Qty using the Set Qty button.
- Set Qty: This option allows you to manually define the UPC quantity. All other fields are system-calculated and will be disabled for editing.
Figure 1.1.5- Expected Qty: The system shows the expected quantity of the selected product.
- UPC QOH: The system shows the product's current UPC quantity on hand.
- Part Cost: Enter the part cost.
- Total Cost: This is the automatically generated total cost based on the part quantity and part cost. Edit, if need be.
- Excise Tax: If applicable, please enter the excise tax for the part in this field.
- Invoice Item Total: This is the total of items on the invoice.
- Margin: The system computes the product's margin percentage and displays it in this field.
- Close: This button lets you close the screen without saving the changes.
- Save & Close: If you click the "Save & Close" button, the system will add the product to the invoice and close the Add/Update Product screen.
- Save & Add: If you click the "Save & Add" button, the system will add the product to the invoice and keep the Add/Update Product screen open so you can add another product.
- The system will add the products, and the screen will look like the one shown in Figure 1.1.6.
Figure 1.1.6Column Titles in the Products On Invoice Section: Each column title indicates the type of information in the column. The following two-column fields are editable:
- Excise Tax: This field shows the appropriate excise tax, if any. You can change it if required. Please refer to section 1.2 Excise Tax Calculations to learn how the system calculates and applies excise tax.
- Update Cost Checkbox: Mark this checkbox to update the product's cost.
Fields and Buttons:1.1: Edit Product: Click this button to modify the product or its details on the invoice.1.2: Delete Product: Click this button to delete the product from the invoice.2.1. Switch Font: Click this button to switch between large and small fonts.2.2. Add: Click this button to add more products to the invoice.3.1: Search: Use the Search button to allow users to quickly find specific products within the invoice by filtering results based on entered keywords.3.2: Columns: Use this drop-down menu to select the columns you need to view on the invoice. The column options list will appear when you click this drop-down menu, as Figure 1.1.7 shows. Select the columns you wish to view in the invoice.Figure 1.1.73.2: Refresh: Use this button to refresh the information on the invoice if required.3.3: Invoice Information: The legend in the Invoice Information pop-up provides a clear explanation of the highlighted color used for cells and text, enabling users to accurately interpret system indicators.
Cell Highlights
Color
Meaning
Yellow
Cost Each field updated
Text Highlights
Color
Meaning
Red
Variance ≠ 0
Green
Variance = 0 (in applicable columns)
4: This section lets you (1) update the product's cost in the system if required. (2) Mark the invoice as "Manually Reviewed."4.1: Manually Reviewed: Enable this button to mark the invoice as "Manually Reviewed." When you enable this button, an alert message will appear, as Figure 1.1.8 shows. Click "Yes." The system will mark the invoice as "Manually Reviewed" and show a success message.Figure 1.1.8Note: Once you mark an invoice as "Manually Reviewed," you cannot undo it.
4.2: Check All: Click this option to select all products to update the cost. The screen with the following two options appears.Figure 1.1.9
- Select Current List: Click this option to select only the items currently visible on the screen.
- Select All Records: Click this option to select every product in the dataset, including those not visible on the current page.
You can also choose a single product by clicking the "Update Cost" checkbox in the Products On Invoice section.
Figure 1.1.10
Note: When users choose to Update Cost while applying invoices or cost changes. If this action updates item pricing and if the Automatically Print Label On Price Changes setting is enabled, labels are automatically queued for printing.
4.3: Uncheck All: Click this option to deselect all products to update the cost.4.4: Apply Cost To All Zones: Tick this checkbox to apply the cost changes to all pricebook zones.4.5: Apply Cost Changes: Click this button to apply the cost changes.5.1: Add Notes: This button lets you add notes to the invoice record for your internal reference. These notes are not for inclusion on the invoice.5.2: View Notes: This button lets you view any notes added to the invoice. When you click this button, the Notes History screen will appear. It will show all notes added to the invoice, information about the user who added them, and timestamps.6.1: Print Invoice: Use this button to print the invoice.6.2: Copy Invoice: Use this button to copy the invoice.6.3: Delete: Use this button to delete the invoice.6.4: Apply Invoice: Use this button to apply the invoice.6.5: Attachment: Use this button to view or add an attachment to the invoice. The Invoice Attachments screen will appear when you click this button, as Figure 1.1.11 shows. If there is one, it will show the attached document. For example, this is useful if you would like to attach the original invoice provided by the vendor.Figure 1.1.11
- Click the "Upload" button to upload the document. The Upload Invoice Attachments screen will appear, as Figure 1.1.12 shows.
Figure 1.1.12
7. Basic Details:
- Store: Here, the store's name is mentioned, and the ordered items are supplied.
- Vendor: The name of the vendor who sent the order is mentioned here.
- Purchase Order: If you have converted any purchase order to an invoice, that purchase order number is mentioned here.
- Invoice Date: The date the invoice was created is mentioned here.
- Invoice Type: The type of invoice, i.e., Standard Invoice or Negative Invoice, is mentioned here.
- Created By: The name of the person who created this invoice is mentioned here.
8. Invoice Information
- Total Cost: The total cost of the items on the invoice is mentioned here.
- Part Qty: The part quantity is the default value set in the Part Num Units field associated with that vendor part.
- Expected Part Qty: The Expected Quantity is the value expected to be received at the selected store.
- Expected Cost: The Expected Cost is the value obtained by multiplying the Cost per Unit and the Expected Quantity. It estimates the total cost we expect to incur for the items on the invoice. The system auto-calculates the Expected Cost. However, if required, you can use the Edit icon next to it to edit the value. The system will allow a maximum of $999,999.00 Expected Cost per invoice.
- Item Qty: The Item Quantity is the quantity value of the Product Quantity Received.
- Expected Item Qty: This is the Item Quantity that the store expects.
- Status: This displays the invoice status: Applied/Not Applied.
- Applied Date & Time: The invoice is applied to the inventory.
- Extracted (Toggle): Using this toggle, you can update the extracted flag. Switch the toggle to:
- Yes to mark the invoice as extracted.
- No to mark the invoice as not extracted.
The system automatically saves the change when the toggle is updated. After the Extracted flag is updated, the system displays a confirmation message indicating that the status was successfully changed. For example, “Invoice marked as extracted successfully.” These messages confirm that the invoice extraction status has been updated and saved successfully.
The Invoice Information section has an Edit icon next to the editable fields. If necessary, you can click on it to edit the information.Figure 1.1.139. Other Information
- Invoice Surcharge: Here, you see the invoice surcharge, if any.
- Prepaid Sales Tax: Here, you see the prepaid sales tax, if any.
- Notes: Here you see the notes added to the Notes field shown in Figure 1.1.14.
- Misc Fees: Here, you see the applicable miscellaneous fees.
- Excise Tax Totals: Here you see the excise tax total, if any.
The Invoice Information section has an Edit icon next to the editable fields. If necessary, use it to edit the information.Figure 1.1.14
Check out the linked video to learn how to manage invoices.1.2 Excise Tax Calculations
Excise tax rates are configured in the Invoice Excise Tax Rules and can be overridden at the product level (Edit Products>>Additional Information>>Overrides>>Override Excise Tax).
- If the Charge Excise Tax on Fees toggle is set to NO in the Add/Edit Location screen, the excise tax is calculated only on each item's extended cost, generally the total cost (Cost X Item Quantity).
- If the Charge Excise Tax on Fees toggle is set to YES in the Add/Edit Location screen, the system performs the following steps:
- Calculate total fees: The system adds the Surcharge, Miscellaneous Fees, and Prepaid Sales Tax.
- Distribute fees across items: The total fees are distributed to all the items in the invoice in proportion to its extended cost compared to the total extended cost of all items.
- Calculate excise tax: The excise tax is calculated based on the sum of each item's extended cost and their distributed fees.
The example below will help you understand the tax calculations better:
Suppose you have two items on an invoice:
- Item A – Extended cost = $1,000
- Item B – Extended cost = $2,000
- Total extended cost = $3,000
Some fees need to be added before calculating excise tax:
- Surcharge = $150
- Miscellaneous Fees = $50
- Prepaid Sales Tax = $300
- Total Fees = $500
Step 1 – Fees Distribution
The system spreads the $500 in fees across items based on their share of the total cost.
- Item A’s share of cost = $1,000 ÷ $3,000 = 1/3 (33.3%)
- Item B’s share of cost = $2,000 ÷ $3,000 = 2/3 (66.7%)
Now apply this percentage to the total fees:
- Item A’s fee share = 33.3% × $500 = $166.67
- Item B’s fee share = 66.7% × $500 = $333.33
Step 2 – Adjustment in Item Cost
Add each item’s fee share to its original cost:
- Item A adjusted cost = $1,000 + $166.67 = $1,166.67
- Item B adjusted cost = $2,000 + $333.33 = $2,333.33
Step 3 – Excise Tax Calculation
Excise tax is now calculated on the adjusted cost instead of the original cost. (Example assumes 10% excise tax)
- Item A excise tax = 10% × $1,166.67 = $116.67
- Item B excise tax = 10% × $2,333.33 = $233.33
- Total excise tax = $350
2. Editing the Invoice
You can edit an invoice record only prior to it being applied. Once applied, the changes cannot be reversed.
You can make the following changes to an invoice prior to it being applied:
- Add product(s) to the invoice.
- Delete product(s) from the invoice.
- Edit some of the sections in the Invoice Information section and the Other Information section.
Please follow the steps below to edit an invoice.
- Click the Edit icon highlighted in Figure 0.1.
- The Edit Invoice screen will appear, as Figure 2.1 shows.
Figure 2.1
- Please read the descriptions written below Figure 1.1.5 to understand the screen details. Edit the information per the requirements and click "Save & Close." The system will save the changes and show the success message.
3. Deleting an Invoice
You can delete the invoice record from the Invoices home screen and the Edit Invoice screen.
Please follow the steps below to delete an invoice record from the Invoices home screen:
- Click the Delete icon shown in Figure 0.1.
- A warning dialog will appear with two related options, as Figure 3.1 shows.
Figure 3.1
- Click “Yes, Delete” to delete the invoice record.
- Click “Cancel” to close the pop-up and skip the deletion process.
- To delete the invoice record from the Edit Invoice screen:
- Click the Edit icon highlighted in Figure 0.1.
- The Edit Invoice screen will appear, as Figure 1.1.4 shows.
- Click the Delete button. The warning dialog will appear, as Figure 3.1 shows.
- Click “Yes, Delete" to delete the invoice record.
- Click “Cancel” to close the pop-up and skip the deletion process.
4. View Deleted Invoices – Deleted Date Column
The Invoices List page will display the Deleted Date for deleted invoices. This provides better visibility into when an invoice was deleted and by whom.
Figure 3.2
Deleted Date Column
When you click on the View Deleted Items button:
- A new Deleted Date column is displayed in the invoices grid.
- The column shows the date and time when the invoice was deleted.
- The Deleted Date column:
- Appears only for deleted invoices
- Does not appear for active invoices
- Is displayed to the right of the Invoice Date column
- Is sortable
Deleted By Information
- The Deleted Date value is displayed as a hyperlink, similar to the Invoice Date and Applied Date columns.
- When you click on the deleted timestamp:
- A tooltip is displayed showing:
“Deleted By <User/Employee>: <User Name/Employee Name>” - This behavior is consistent with how the system displays details for Invoice Date and Applied Date.
Access & Permissions
- This feature is available to all user roles:
- Admin
- Client
- Employee
5. Printing an Invoice
Follow the steps mentioned below to print an invoice:
- Click the “Print” button highlighted in Figure 0.1 or the "Print Invoice" button highlighted in Figure 0.1 to print the invoice as a PDF, CSV, or Excel file.
- The form highlighted in Figure 4.1 will appear on your screen.
Figure 4.1Fields:
- Report Type: Select the report type: Print Invoice or Print Cost Changes.
- Sort Type: Select the sorting type from Category, Description, Department UPC, and Vendor Part.
- Include Department Total: Enable this button to include the department total.
- Export Type: Select the export type: PDF, CSV, or Excel.
- Include Header: Enable this button to include a header on every page of the invoice report.
- Repeat Header on Every Page: Enable this button to repeat the header on every page.
- Print Title on Every Page: Enable this button to print the title on every page.
- Group by Department: Enable this button to group the records by department in the invoice report.
- Send As Email: Enable this toggle button to send the report's PDF file to the email ID. The Email Address field will appear. Enter the email addresses, one per line, and click "Send Email."
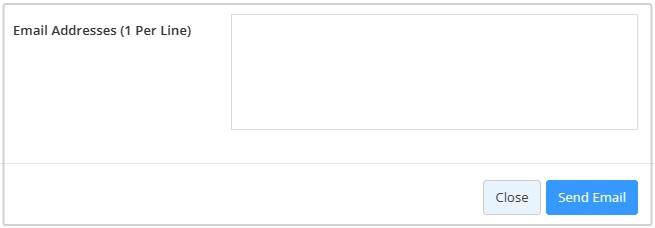 Figure 4.2
- Below is a sample PDF of the "Invoice Details Report."
Figure 4.3
6. Copying an Invoice
Follow the steps mentioned below to copy the invoice:
- Click the Copy button highlighted in Figure 0.1 to copy the invoice.
- The Copy Invoice screen will appear, as Figure 5.1 shows.
Figure 5.1Fields:
- Invoice Number: Enter the new invoice number in this field.
- Location: Select the location from the drop-down list for which the invoice will be copied.
Figure 5.2
- Invoice Date: This field indicates the invoice date. By default, the system will pick the current date. Click in the field to open a drop-down calendar and select the required date.
Figure 5.3- Keep Cost Changes: Set it to YES if you wish to apply the cost changes to the new invoice.
- Reverse Quantity Signs: If this is toggled to YES, it copies the invoice using the exact opposite values of the items applied to the original invoice. If -5 is on the original invoice, then +5 would be on the newly copied invoice.
- Click the "Copy" button to successfully copy the invoice; a success message is highlighted in Figure 5.4.
Figure 5.4
- Click “Go to the New Invoice” to view and edit the newly created invoice.
- Click “Close” to close the pop-up and skip the process.
7. Manage Settings
The "Manage Settings" button, highlighted in Figure 0.1, will navigate you to the Inventory Settings page of Control Center. You can configure settings related to invoicing, receiving, and alerts regarding product stock and inventory.
7.1 Mass Complete Orders
The admin/client user can now mass apply invoices from the Invoice List grid to improve operational efficiency by enabling to perform bulk actions directly from the list pages.
Under the Actions column, the “Apply Invoice” icon will be displayed as shown below:
Figure 7.1
7.1.1 How to Apply Multiple Invoices
Step 1: Select Invoices
- Select one or more Unapplied Invoices.
- Use:
- Shift key for range selection
- Ctrl key for multiple individual selections
Figure 7.2
Step 2: Selection Limit
- A maximum of 30 invoices can be selected at a time.
- If more than 30 invoices are selected, the system will display:
- “Maximum 30 Invoices can be selected to be applied.”
Step 3: Click Apply Invoice
- Click the Apply Invoice icon.
Figure 7.3
Step 4: Progress Window
A pop-up window will display:
- The number of invoices are being processed.
Figure 7.4
- Click "OK."
- A progress bar will be displayed.
- Click "OK" to close the status window.
Step 5: Final Status
After processing, the system will display:
- Number of invoices successfully applied
- Number of invoices pending due to errors
- Close the status window
- Refresh the Invoice List page automatically
8. FTx Academy Training Course
Check out this FTx Academy video to learn how to use the "Receiving" module.
To gain a more comprehensive understanding, sign up for the FTx Academy training program — enroll in the courses and explore the topic lesson by lesson and reinforce your learning with quick quizzes at the end of each module.
Related Articles
Receiving - Invoices in POS – Classic
Receiving - Invoices Overview Invoices are an efficient method for updating store inventory levels. They establish a traceable inventory movement trail against vendors, ensuring quantities and costs are correctly reflected. There are two ways to ...Verified Invoices
Verified Invoices Overview "Verified Invoices" shows the list of verified invoices once the store completes the invoice verification process using the handheld device. Generally, invoices are processed and completed via EDI. Therefore, retailers find ...Invoices (Employees)
Overview Receiving invoices is an efficient method for updating store inventory levels. It establishes a traceable inventory movement trail against vendors, including quantities and costs. Additionally, invoices aid in projecting inventory, which ...Verified Invoices - Store Employee
Verified Invoices Overview "Verified Invoices" shows the list of verified invoices once the store completes the invoice verification process using the handheld device. Generally, invoices are processed and completed via EDI. Therefore, retailers find ...Invoice Export
Invoice Export Overview It is essential for a retail business to keep an eye on vendor-wise and location-wise invoices. "Invoice Export" enables you to export invoices for the combination of selected vendors and location(s) or location group(s) for ...