System Discounts Report
System Discounts Report Overview
This report is multiple reports in one and gives different formats, groupings, details, and summaries of system discounts applied in transactions. Different types of filters can also be configured, depending on your requirements. The system will display the records of system discounts only according to the selected filter options.
It will also display several fields with detailed and automatically calculated information, depending on the filter option selected from the drop-down filter labeled “Report Type."
1. Reaching the "System Discounts Report"
To reach the "System Discounts Report," follow the steps below:
- Step 1: Log into Control Center
- Step 2: Choose Point of Sale
- Step 3: Choose Reports
- Step 4: Choose Sales Reports
- Step 5: Choose System Discounts
See Figure 1.1. You will see many types of sales reports that will be useful to your retail business. By clicking the drop-down selection, you will see the different types of sales reports.
Figure 1.1
You will see the "Report Data is Empty" message initially. You need to select the date range to check the "System Discounts Report." See Figure 1.2.
Figure 1.2
2. Generating the "System Discounts Report"
When you navigate to the page, you will see the options pre-selected by default. You can generate the System Discounts Report for the selected date range.
Figure 2.1
Report Columns:
- Discount Name: This column displays the name of the discount created in the main module.
- Reimbursable: This column displays the flag value that is set while creating a discount. It states whether or not the discount is reimbursable.
- Discount Qty: This column presents the number of item quantities on which the selected discount is applied.
- Discount Amount: This column will display the amount value for which the discount is applied during the transaction in the selected date range.
3. System Discounts Report Type
The report type is categorized into 6 different categories to fetch different discount results.
Figure 3.1
- System Discount Summary: This report type will display the system discount summary with Discount Name, Reimbursable, Discount Qty, and Discount Amount details in a report. See Figure 2.1.
- System Discount Summary by Customer: This report type will display the system discount summary grouped by customer name.
Figure 3.2
- System Discount Summary Group by Store: This report type will display the system discount summary grouped by store location name.
Figure 3.3
- System Discount Details: This report type will display the system discount details, such as Store Name, Date, Reg #, Receipt #, Discount Qty, and Discount Amount, grouped by Discount Name. See Figure 3.4.
Figure 3.4
- System Discount Details by Customer: This report type will display the system discount details, such as Store Name, Date, Reg #, Receipt #, Discount Qty, and Discount Amount, grouped by location name. See Figure 3.5.
Figure 3.5
- System Discount Item Details: This report type will display the item's name on which the discount is applied, grouped by location name, and display the discount details such as UPC, Item Name, Qty Sold, Qty Discounted, and Discount Given. See Figure 3.6.
Figure 3.6
4. Filter By Discount
The Filter By Discount drop-down allows you to control how discount-related data is displayed in the report. You can choose to view all discounts, filter the report by specific discount codes, or filter by discount groups.
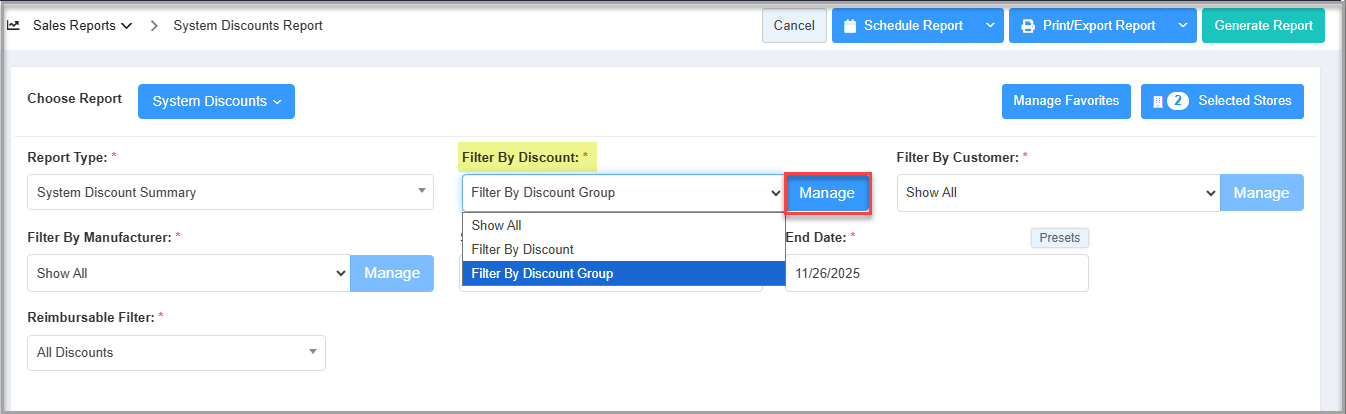
Figure 4.1
Filter Options:
- Show All: This option displays the slow-selling items for all the store locations.
- Filter by Discount: This button lets you filter the report and generate the report by the discount name.
- Filter by Discount Groups: This button allows you to filter the report and generate the report by discount group.
- The Manage Filters screen will appear, showing the discount list, as Figure 4.2 shows.
Figure 4.2
- 1: Search: Use this Search box to search for a specific discount.
- 2: Active Only: Use this filter to filter the Manage Filters screen data based on four parameters: Active Only, Active & Current Only, Inactive Only, and All Records.
- 3. Select Scan Data Classification: Use this filter to filter the Manage Filters screen data based on four parameters: Automatic/None, MultiPack, Account Funded, or Manufacturer Funded.
What is Scan Data Classification?Several prominent tobacco manufacturers, including ITG, PM/UST, and RJ Reynolds, offer a scan data reporting program that allows retailers to share detailed sales data in exchange for financial incentives. Based on the business terms, a corporate employee determines whether a discount should be included in the scan data reporting. If a discount is to be included, the corporate employee will classify it as Automatic/None, MultiPack, Account Funded, or Manufacturer Funded.

- 4: Custom Selections: Use these checkbox filters to filter the Manage Filters screen data based on four parameters:
- Manufacturer in Scan Data: If you tick this checkbox, the Manage Filters screen data will show only those discounts included in the scan data reporting.
- Discount Cost: If you tick this checkbox, the Manage Filters screen data will show only those discounts for which the discount is applied on the cost, not the price.
- Require Loyalty: If you tick this checkbox, the Manage Filters screen data will show only discounts that require a Loyalty Customer to avail themselves of the discount.
- Apply Tax: If you tick this checkbox, the Manage Filters screen data will show only those discounts for which the tax would be applied before the discount is applied.
FTx Cloud POS provides significant flexibility for corporate employees when creating discounts. They can select from various parameters, including the abovementioned. These checkboxes allow you to filter the discount list based on the selected parameters.
- 5: Results: This section shows the list of all discounts. You will see the data accordingly if you have applied the 2, 3, or 4 filters.
- 6: Selection Checkboxes: Select the required discounts by checking the appropriate checkboxes.
- 7: Arrow: Click the green Arrow button to move the selected records to the Selected Area.
- The Manage Filters screen will look like the one in Figure 4.3.
Figure 4.3
- 1: Clear Selection: Click the "Clear Selection" button to remove the whole selection. To remove any record from the list, click the Remove (x) icon.
- 2: Apply: Click "Apply" to apply the selection.
- As Figure 3.2.4 shows, the names of the selected discounts are displayed under "Selected Filter Types." When you click "Generate Report," the system generates the report only for the selected discounts.
Figure 4.4
As shown in Figure 4.5, one of the selected discount names is 50% Off Discount 3423, and the result for the "50% Off Discount 3423" discount is displayed in the report. If there is data available for the other selected discount for the store, the system will show that, too.
Figure 4.5

Similarly, you can filter the report by discount group by following the same steps used for Filter by Discount.
5. Filter By Customer
The Filter By Customer drop-down menu lets you select report data based on specific customers. It has two selection options: Show All and Filter By Customer.
- Show All: The system selects "Show All" by default. It considers all customers when generating the report for the selected locations. The "Manage" button is disabled for this option.
- Filter By Customer: This option generates the report by selecting specific customers. Once you choose this option, the system will enable the "Manage" button to set up the filters.
Please follow the steps below to select specific customers.
- In the Filter By Customer drop-down menu, select the "Filter By Customer" option and click the "Manage" button.
Figure 5.1
- The Manage Filters screen will appear, showing the customer list, as Figure 5.2 shows.
Figure 5.2
- 1: Search: Use this Search box to search for a specific customer.
- 2: Results: This section shows the list of all customers.
- 3: Selection Checkboxes: Select the required customers by checking the appropriate checkboxes.
- 4: Arrow: Click the green Arrow button to move the selected records to the Selected Area.
- The Manage Filters screen will look like the one in Figure 5.3.
Figure 5.3
- 1: Clear Selection: Click the "Clear Selection" button to remove the whole selection. To remove any record from the list, click the Remove (x) icon.
- 2: Apply: Click "Apply" to apply the selection.
- Figure 5.4 shows that the selected customers' names are displayed under "Selected Filter Types." When you click "Generate Report," the system will generate the report only for the selected customers.Figure 5.4
6. Filter By Manufacturer
The Filter By Manufacturer drop-down lets you select the report data using specific customers. It has two selection options: Show All and Filter By Manufacturer.
- Show All: The system selects "Show All" by default. It considers all manufacturers when generating the report for the selected locations. The "Manage" button is disabled for this option.
- Filter By Manufacturer: This option generates the report by selecting specific manufacturers. Once you choose this option, the system will enable the "Manage" button to set up the filters.
Please follow the steps below to select specific manufacturers.
- Select the Filter By Manufacturer option in the Filter By Manufacturer drop-down and click the "Manage" button.
Figure 6.1
- The Manage Filters screen will appear, showing the manufacturer list, as Figure 6.2 shows.
Figure 6.2
- 1: Search: Use this Search box to search for a specific manufacturer.
- 2: Results: This section shows the list of all manufacturers.
- 3: Selection Checkboxes: Select the required manufacturers by checking the appropriate checkboxes.
- 4: Arrow: Click the green Arrow button to move the selected records to the Selected Area.
- The Manage Filters screen will look like the one in Figure 6.3.
Figure 6.3
- 1: Clear Selection: Click the "Clear Selection" button to remove the whole selection. To remove any record from the list, click the Remove (x) icon.
- 2: Apply: Click "Apply" to apply the selection.
- As Figure 6.4 shows, the names of the selected manufacturers are displayed under "Selected Filter Types." When you click "Generate Report," the system generates the report only for the selected manufacturers.
Figure 6.4
7. Date Range & Presets
You can filter your sales data in the report by selecting the date range as well as specific times.
By clicking the Edit box, you will be taken to a tiny calendar where you can select a specific date range. You can manually enter the date in mm/dd/yyyy format.
See Figure 7.1, Figure 7.2, & Figure 7.3.
- Start Date: This field lets you choose the start date of the date range.
Figure 7.1
- End Date: This field lets you choose the end date of the date range.
Figure 7.2
- Presets: The Presets label is provided to select the specific duration/interval to generate the report with that.
Figure 7.3
8. Reimbursable Filter
This is a flag set in the "Discounts" module that defines whether the discount is applied at the store during the transaction.
Figure 8.1
- All Discounts: This option is selected by default. When selected, it displays the report results as displayed in Figure 2.1 above.
- Reimbursable Discounts: It means any fee or charge that is reimbursed to the retailer for reduced pricing of the store items provided by the third party (vendor/manufacturer) if the discount is used.Figure 8.2
- Non-Reimbursable: This discount is store-promoted and termed as non-reimbursable.Figure 8.3
9. Scheduling a Report
FTx Cloud POS supports report automation. You can configure a report and schedule it. The system will send the scheduled report to the indicated email IDs at the defined frequencies (daily, weekly, bi-weekly, monthly, quarterly, etc.).
10. Printing/Exporting a Report
You can print or export any report according to your requirements. When you use the Print function, the system creates and opens the report's PDF file in a new tab. You can download the soft copy or print the paper copy according to your requirements.
11. Manage Favorites
FTx Cloud POS allows quick access to the reports you need to view frequently through "Favorite Reports." You can save a report as a favorite and manage all your favorite reports from any of the report screens using the "Manage Favorites" button.
Related Articles
System Discounts Report - Store Employee
System Discounts Report Overview The "System Discounts Report" in the FTx Cloud POS system provides a detailed overview of all discounts automatically applied by the system based on predefined rules or promotions. This report is a collection of ...Discounts
Discounts Overview System discounts in FTx Cloud POS are automated pricing adjustments applied to products or transactions based on predefined rules. These rules determine when and how discounts are triggered, allowing businesses to strategically ...Discounts - Store Employee
Discounts Overview In FTx Cloud POS, system discounts are automated pricing adjustments applied to products or transactions based on predefined business rules. These rules enable businesses to strategically manage pricing across various locations, ...Flash Report
Flash Report Reports -> Sales Reports -> "Flash Report" The "Flash Report" will allow you to check the following configurations: - Buydowns - Commissions - System Discounts - Loyalty Campaigns You can check the configuration records that are already ...Flash Report - Store Employee
Flash Report Overview The "Flash Report" lets you view three configurations: Buydowns, Commissions, and System Discounts. You can filter them by using the Current, Future, and Expiring filter options. This article includes information about: How to ...