Training Mode Usage Report
Training Mode Usage Report Overview
The "Training Mode Usage Report" provides information associated with the training mode access, including activity types, locations, registers, cashier details, and the corresponding timestamp.
This article includes information about:
- How to generate the "Training Mode Report."
- How to apply the filter options to customize the report.
- How to automate (schedule) or print a report.
- How to mark the report as a favorite report.
1. Reaching the "Training Mode Usage Report"
- Step 1: Log into Control Center
- Step 2: Choose Point of Sale
- Step 3: Choose Reports
- Step 4: Choose Sales Reports
- Step 5: Choose Training Mode Usage
Figure 1.1 below will help you understand the navigation better.
Figure 1.1
When you select "Training Mode Usage," the Training Mode Usage Report screen will open, which offers relevant filtering and sorting options as Figure 1.2 shows.
Figure 1.2
2. Generating the "Training Mode Usage Report"
Please follow the steps below to generate the "Training Mode Usage Report" that meets your requirements:
- Navigate to the Training Mode Usage Report screen.
- Select the date range and click "Generate Report" to view the "Training Mode Usage Report" for the selected date range.
- You can use the Date Range & Presets, Employee, and Store & Location Groups filters, along with the Show Details checkbox, to generate the report that meets your requirements. These filters can be used in combination for a more tailored report. Please refer to point 3. Report Filter Options to learn more about these filters.
- Click "Generate Report" whenever you change your selection in any field to view the updated report.
- When you click the "Generate Report" button after selecting the date range, the system will show the filtered results, as Figure 2.1 shows.
Figure 2.1
Report Fields 1:
- Location: This field shows the location name where the POS was utilized in training mode.
- Reg #: This field shows the register number where the training mode was activated.
- Cash Drawer open Count: This field shows the number of times the cash drawer was opened during the training mode session.
- Training Mode Start Date: This field shows the date and time when training mode commenced.
- Training Mode End Date: This field shows the date and time when the training mode concluded.
- Cashier Name: This field shows the cashier's name who operated the training mode.
Report Fields 2:
- UPC: This column shows the item's UPC scanned during the training mode.
- Timestamp: This column shows the timestamp when the item was scanned.
- Scanned: This column shows the method used to scan the item.
3. Report Filter Options
FTx Cloud POS lets you view the report according to your preferences using various filter options. You can configure the report with any single filter or a combination of multiple filters. The filters are highlighted in Figure 3.1.
Figure 3.1
1: Report Filters:
- Date Range & Presets: This filter lets you select the report's time interval. 3.1 Date Range & Presets explains further details.
- Employee: This filter lets you view the report for a specific employee. You can view the report for all employees or a selected employee. 3.2 Employee explains further details.
2: Store and Location Filter: This filter lets you view the report for the selected stores (locations) or location groups. 3.3 Filter Store and Location Groups explains further details.
3: Checkbox Filter:
- Show Details: This checkbox lets you view the report in detail. The system ticks this checkbox automatically. If you untick this checkbox, the system will generate a summary report with a link to view it in detail. 3.4 Show Details explains further details.
3.1 Date Range & Presets
The Date Range and Presets filter lets you select the report's time interval.
Date Range
Please follow the steps below to select the report's required date range and time interval:
- Click inside the Start Date field. The drop-down calendar will appear, as shown in Figure 3.1.1.
Figure 3.1.1
- Select the specific date and time from the drop-down calendar. You can also manually enter the date in the MM/DD/YYYY format.
- Click inside the End Date field and follow the same process.
- After making the appropriate selections for other filters, click on "Generate Report."
Presets
The Presets drop-down allows you to generate the report by selecting a specific duration/interval, such as Today, Yesterday, This Week, Last Week, etc. Please follow the steps below to choose the report's required date range using "Presets."
- Hover over the "Presets" button.
- As Figure 3.1.2 shows, a drop-down menu will appear. Select the required duration/interval. The system will automatically set the Start Date and End Date based on your selection.
Figure 3.1.2
3.2 Employee
The Employee filter lets you view the report for a specific employee.
When you click on the Employee dropdown, it will display All Employee followed by a list of individual employees, as Figure 3.2.1 shows. By default, the system selects "All Employees." You can change this by choosing a specific employee's name from the dropdown and clicking "Generate Report."
Figure 3.2.1
- When you generate the report for a specific employee, the system will show the data related to only that employee, as Figure 3.2.2 shows.
Figure 3.2.2
3.3 Filter Stores & Location Groups
The Store & Location Groups filter lets you generate the report for only selected stores (locations) and location groups. Please follow the steps below to apply the filter.
- Click the "No Filter Selected" button in the top right, highlighted in Figure 3.3.1.
Figure 3.3.1
- The Manage Filters screen will appear, as Figure 3.3.2 shows.
Figure 3.3.2
- 1: Manage Filters Drop-Down: The drop-down shows the list of saved custom filters, if there are any. You can select the required filter from this drop-down and click the "Apply" button to apply it.
- 2: Manage Filters Button: This button helps you open the Manage Saved Filters screen. Point 3.3.1 Save and Manage Location Filters explains more details.
- 3: Parameter Tabs: You will see two tabs: Store and Location Group. Select the required tab, e.g., "Store," to create or apply a custom filter specific to the selected stores.
- 4: Search: Use this Search box to search for a specific location.
- 5: Pricebook Zone: Use this drop-down to view the results (stores or location groups) based on pricebook zone.
- 6: Only Active: Use this drop-down to view the results (stores or location groups) based on three parameters: All Locations, Only Active, and Only Deleted.
- 7: Results: This section shows the list of selected parameters. For example, if you have chosen the Store tab, it will show a list of stores.
- 8: Selection Checkboxes: You must select the required stores by ticking the checkbox.
- 9: Arrow: Click the green Arrow button to move the selected stores to the Selected List.
- The Manage Filters screen will look like the one in Figure 3.3.3.
Figure 3.3.3
- 1: Click the "Clear Selection" button to remove the whole selection. To remove any record from the list, click the Remove (x) icon.
- 2: Click "Apply" to apply the selection for generating the report.
- 3: You can click the "Save Filters" button to save the custom filter for future use. Point 3.3.1 Save and Manage Location Filters explains the details.
3.3.1 Save and Manage Location Filters
You can also save the configured custom filters for future use.
- Click the "Save Filters" button shown in Figure 3.3.3.
- The Name screen will appear as shown in Figure 3.3.1.1. Enter the name of the custom filter and click "OK." A success message will appear, and the custom filter will be saved. You can see this custom filter listed in the Manage Filters drop-down.
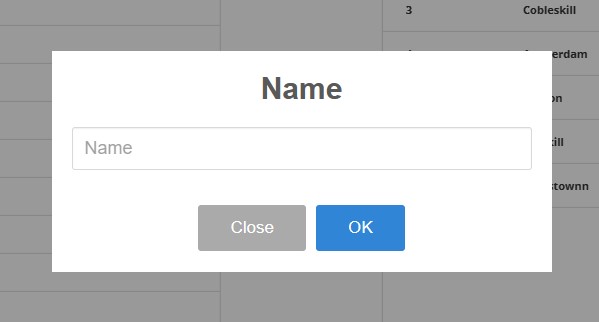 Figure 3.3.1.1
- You can use the saved custom filter from the Manage Filters drop-down whenever needed. You can delete the saved custom filters when you no longer need them. Open the Manage Filters screen again and use the steps shown in Figure 3.3.1.2 as per your requirements.
Figure 3.3.1.2
- 1: Saved Filter Drop-Down: All saved custom filters will appear in the Saved Filter drop-down. You can select the required custom filter and click "Apply."
- 2: Manage Filters: View and manage the saved filters using this button. The Manage Saved Filters pop-up screen will appear when you click the "Manage Filters" button.
- 3: Filter Name: The list shows all saved custom filters. Click on a filter's name to select it.
- 4: Select Filter: Click on the filter's name, then click the "Select Filter" button to select any filter from the list.
- 5: Delete: Use the "Delete" button to remove the filter no longer required from the list. Click on the filter's name and then the "Delete" button. A warning message will appear. Click "OK."
- Similarly, you can filter the records by selecting the location group(s).
- When you set up the filters for locations (stores) and location groups, you can see the details chosen by hovering the mouse cursor over Selected Stores, as shown in Figure 3.3.1.3.
Figure 3.3.1.3
3.4 Show Details
The Show Details checkbox lets you view the report in detail. By default, the system ticks it and generates the report in detail, as shown in Figure 2.1. You can untick it if required.
- If you untick this checkbox, the system will generate a summary report, as Figure 3.4.1 shows. Click the respective View icon under the Actions column to view the details of the training mode usage record.
Figure 3.4.1
- When you click the respective View icon, the system will show the detailed information, as Figure 3.2.2 shows.
Figure 3.4.2
4. Scheduling a Report
FTx Cloud POS supports report automation. You can configure a report and schedule it. The system will send the scheduled report to the indicated email addresses at the defined frequencies (daily, weekly, bi-weekly, monthly, quarterly, etc.).
5. Printing/Exporting a Report
You can print or export any report according to your requirements. When you use the Print function, the system creates and opens the report's PDF file in a new tab. You can download the soft copy or print the paper copy according to your requirements.
6. Manage Favorites
FTx Cloud POS allows quick access to the reports you need to view frequently through "Favorite Reports." You can save a report as a favorite and manage all your favorite reports from any of the report screens using the "Manage Favorites" button.
Related Articles
Register Z Report
Register Z Report When the cashiers/employees complete their shifts, they must generate and submit the sales details report from the POS itself, known as "Register Z." They must generate Register Z before leaving the POS to close their shifts. Thus, ...Tenders List Report
Tenders List Report Overview Tenders are payment methods created in the Control Center and used in the POS for transactions. They include cash, cards, gift cards, and more. Each tender has a unique ID and specific rules, including refund eligibility ...Uplift Sales Report
Uplift Sales Report Overview The "Uplift Sales Report" will display the list of employees who won or lost a spiff commission. The spiff is set up from the Commission Campaign (Pricebook -> Commissions) and the employee will earn the commission ...Tax Exempt Report
Tax Exempt Report Overview The "Tax Exempt Report" provides a list of products that were not subject to sales tax within a specified date range. Users can apply various filters based on their requirements, ensuring the report displays only the ...Scheduling a Report
Overview Scheduling reports can enhance the efficiency and profitability of retail businesses by offering insights into key metrics such as sales volume, customer satisfaction, and delivery times. These insights are instrumental in pinpointing areas ...